Have you ever wondered how paintings are made? Well, it pretty much depends on the time and the artist! During my studies in Amsterdam, I got to dig deep into various painting methods. From figuring out how van Gogh did his thing in the 19th century to getting the rundown on 15th-century religious art, I got up close and personal with the ins and outs of painting.
A closer look at Vincent van Gogh
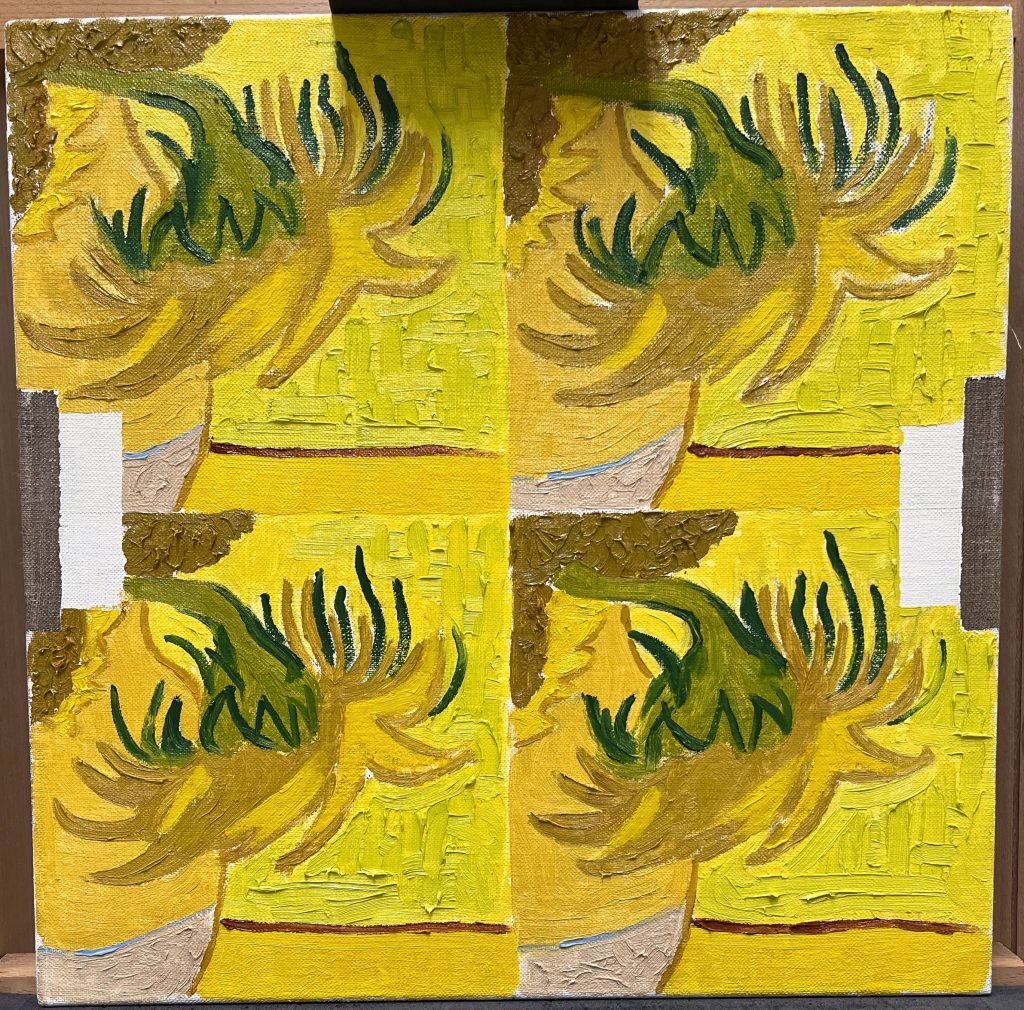
Reconstruction of Sunflowers, Vincent van Gogh, 1889, Oil on canvas
Credits: Van Gogh Museum, Amsterdam (Vincent van Gogh Stichting)
Canvas selection:
During van Gogh’s lifetime, commercial-produced products had become commonplace in art stores. Like many of his contemporaries, van Gogh bought pre-primed canvases from various dealers. Even though the ground layer doesn’t seem to have been a primary concern to the artist, its colour and texture can play an important role in the final painting. For that reason, four grounds of different roughness were tested during this reconstruction.
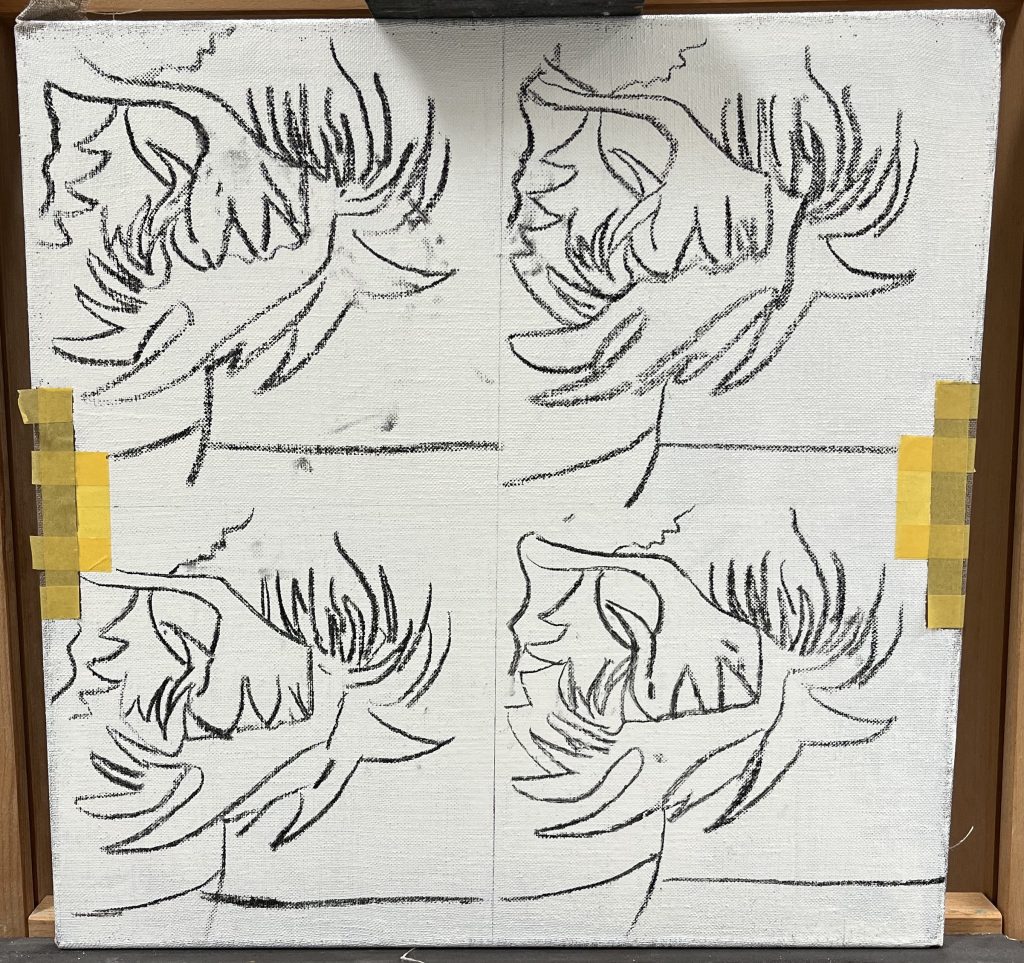
Sketching:
Using charcoal, van Gogh made a rough sketch of his composition.
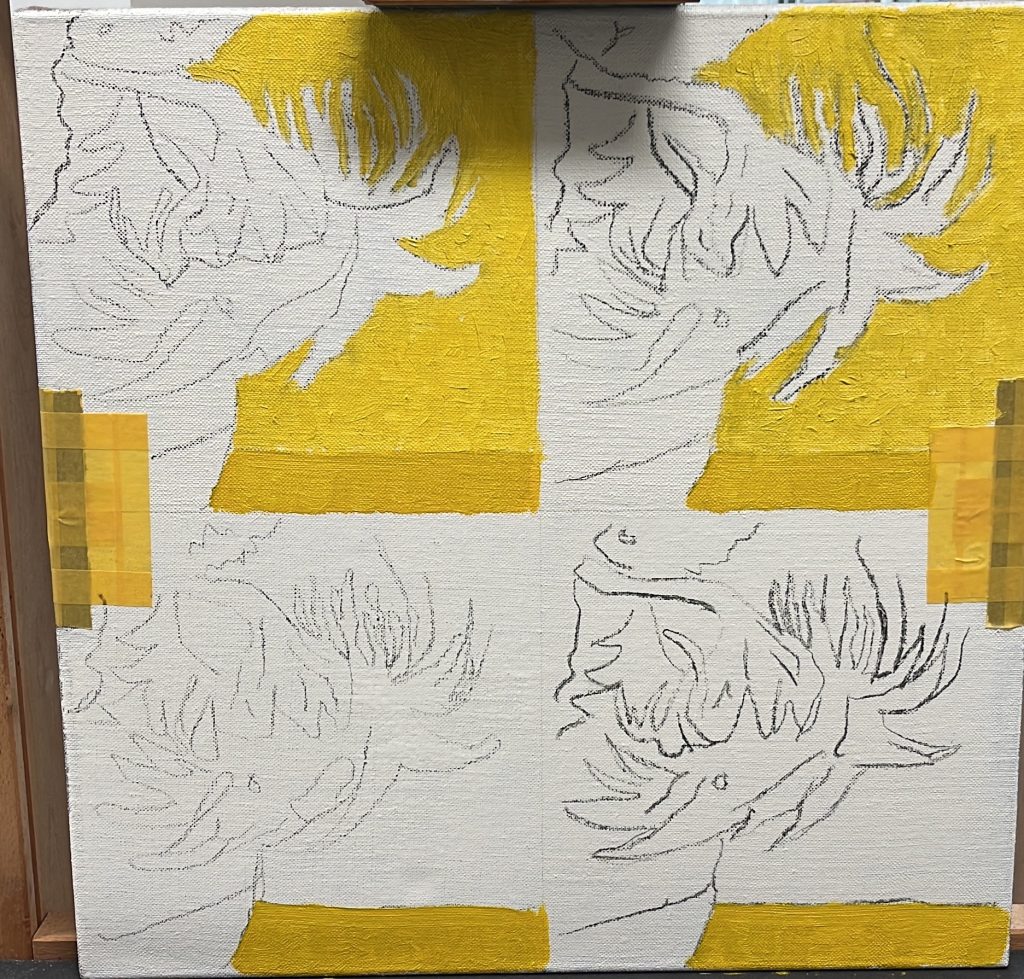
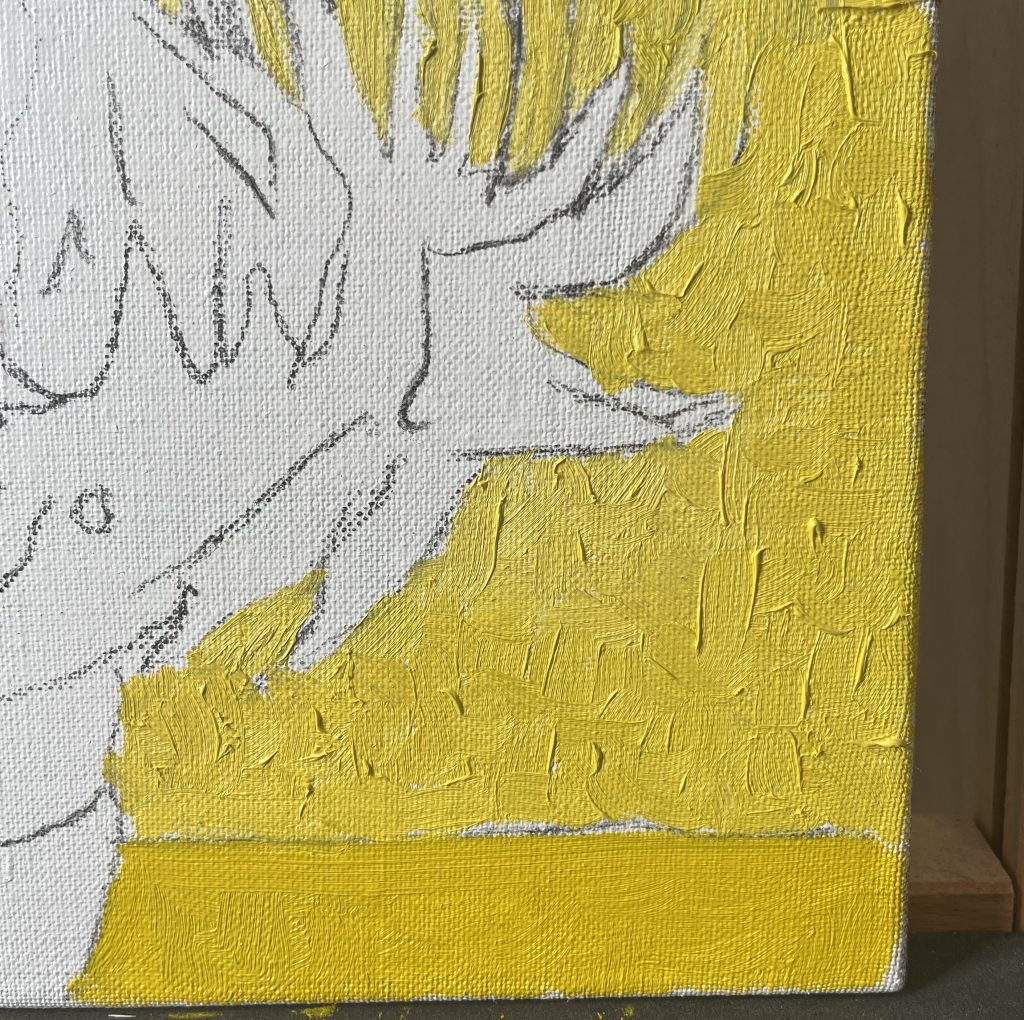
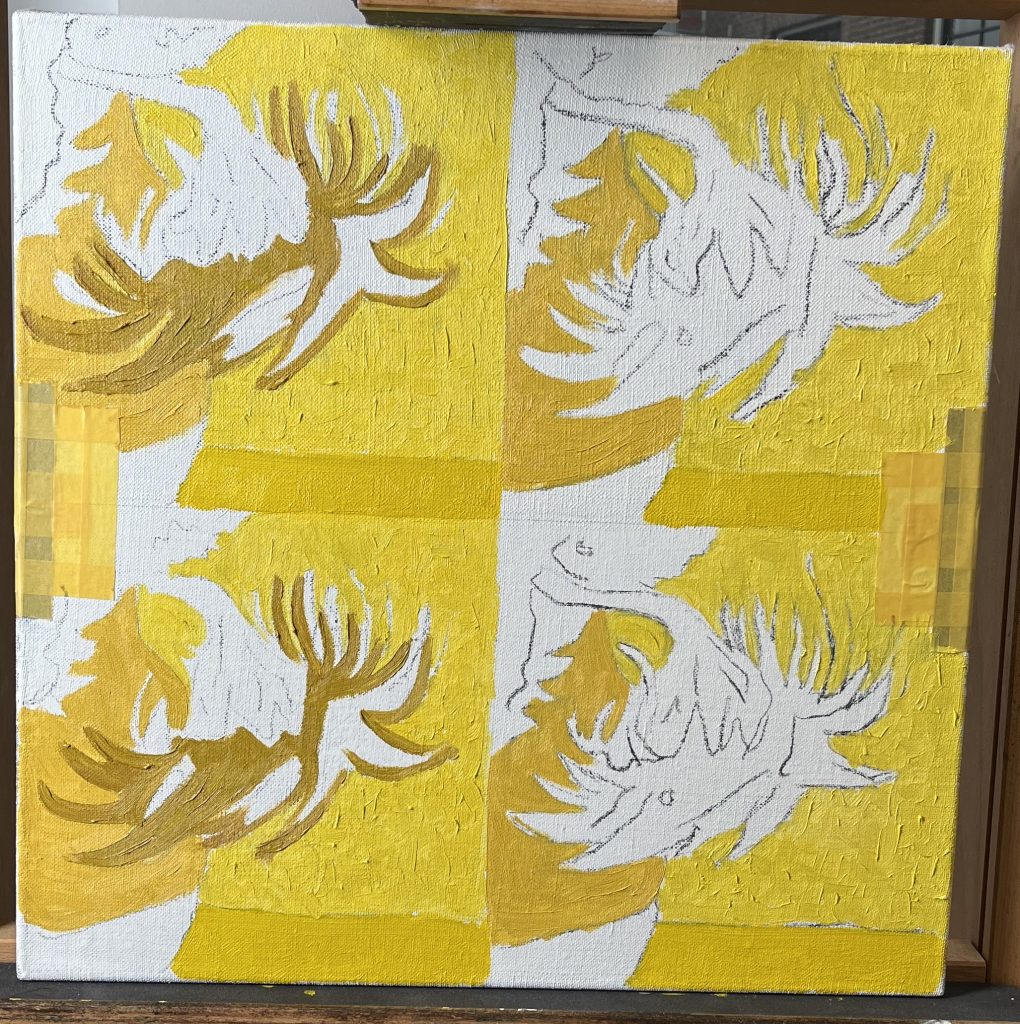
Painting:
Van Gogh bought his oil paint prepared in a tube from various dealers, often referred to as ‘colourmen’. He applied these paints in multiple layers, applying the paints generously to create rich texture effects. Renowned for his vivid palette, van Gogh’s artworks were even more vibrant when freshly completed. Sadly, the passage of time has led to discoloration in many of his paintings, primarily attributed to specific pigments prone to degradation, which were frequently present on his palette. For instance, in this work, the red pigment he used faded. This causes the yellows to be darker and the purples to turn blue!
Art of the 17th century: Ferdinand Bol
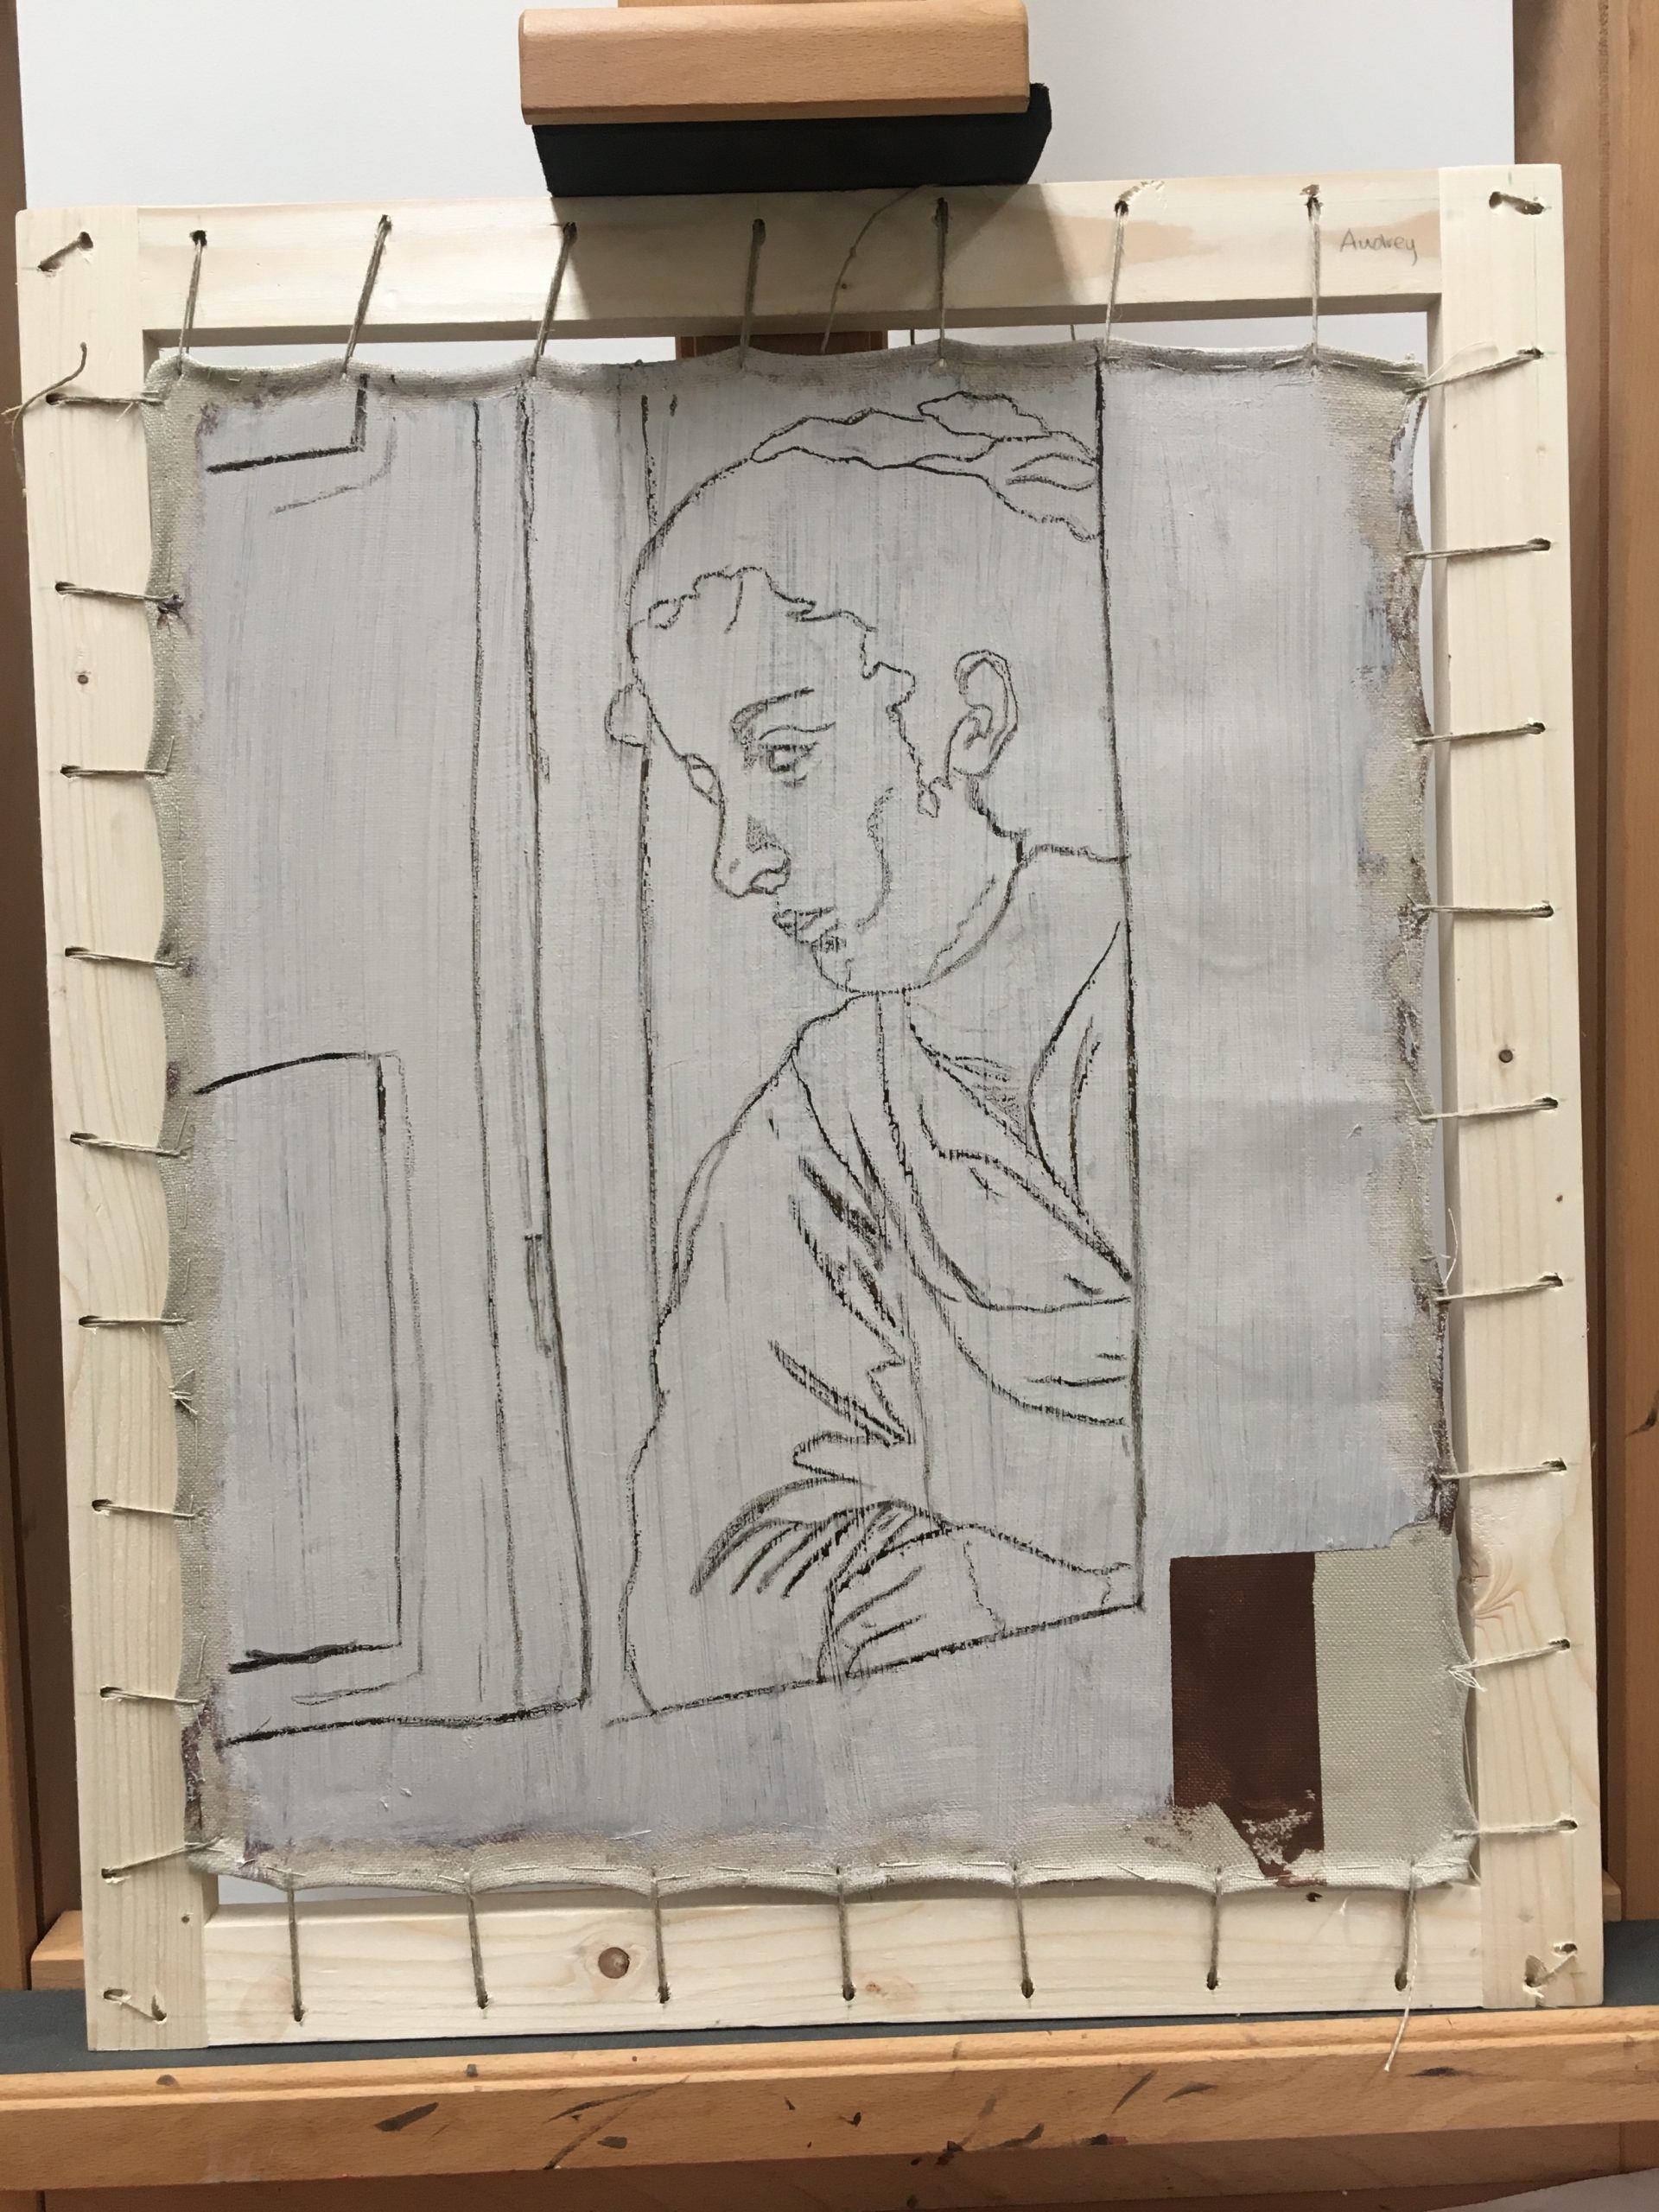
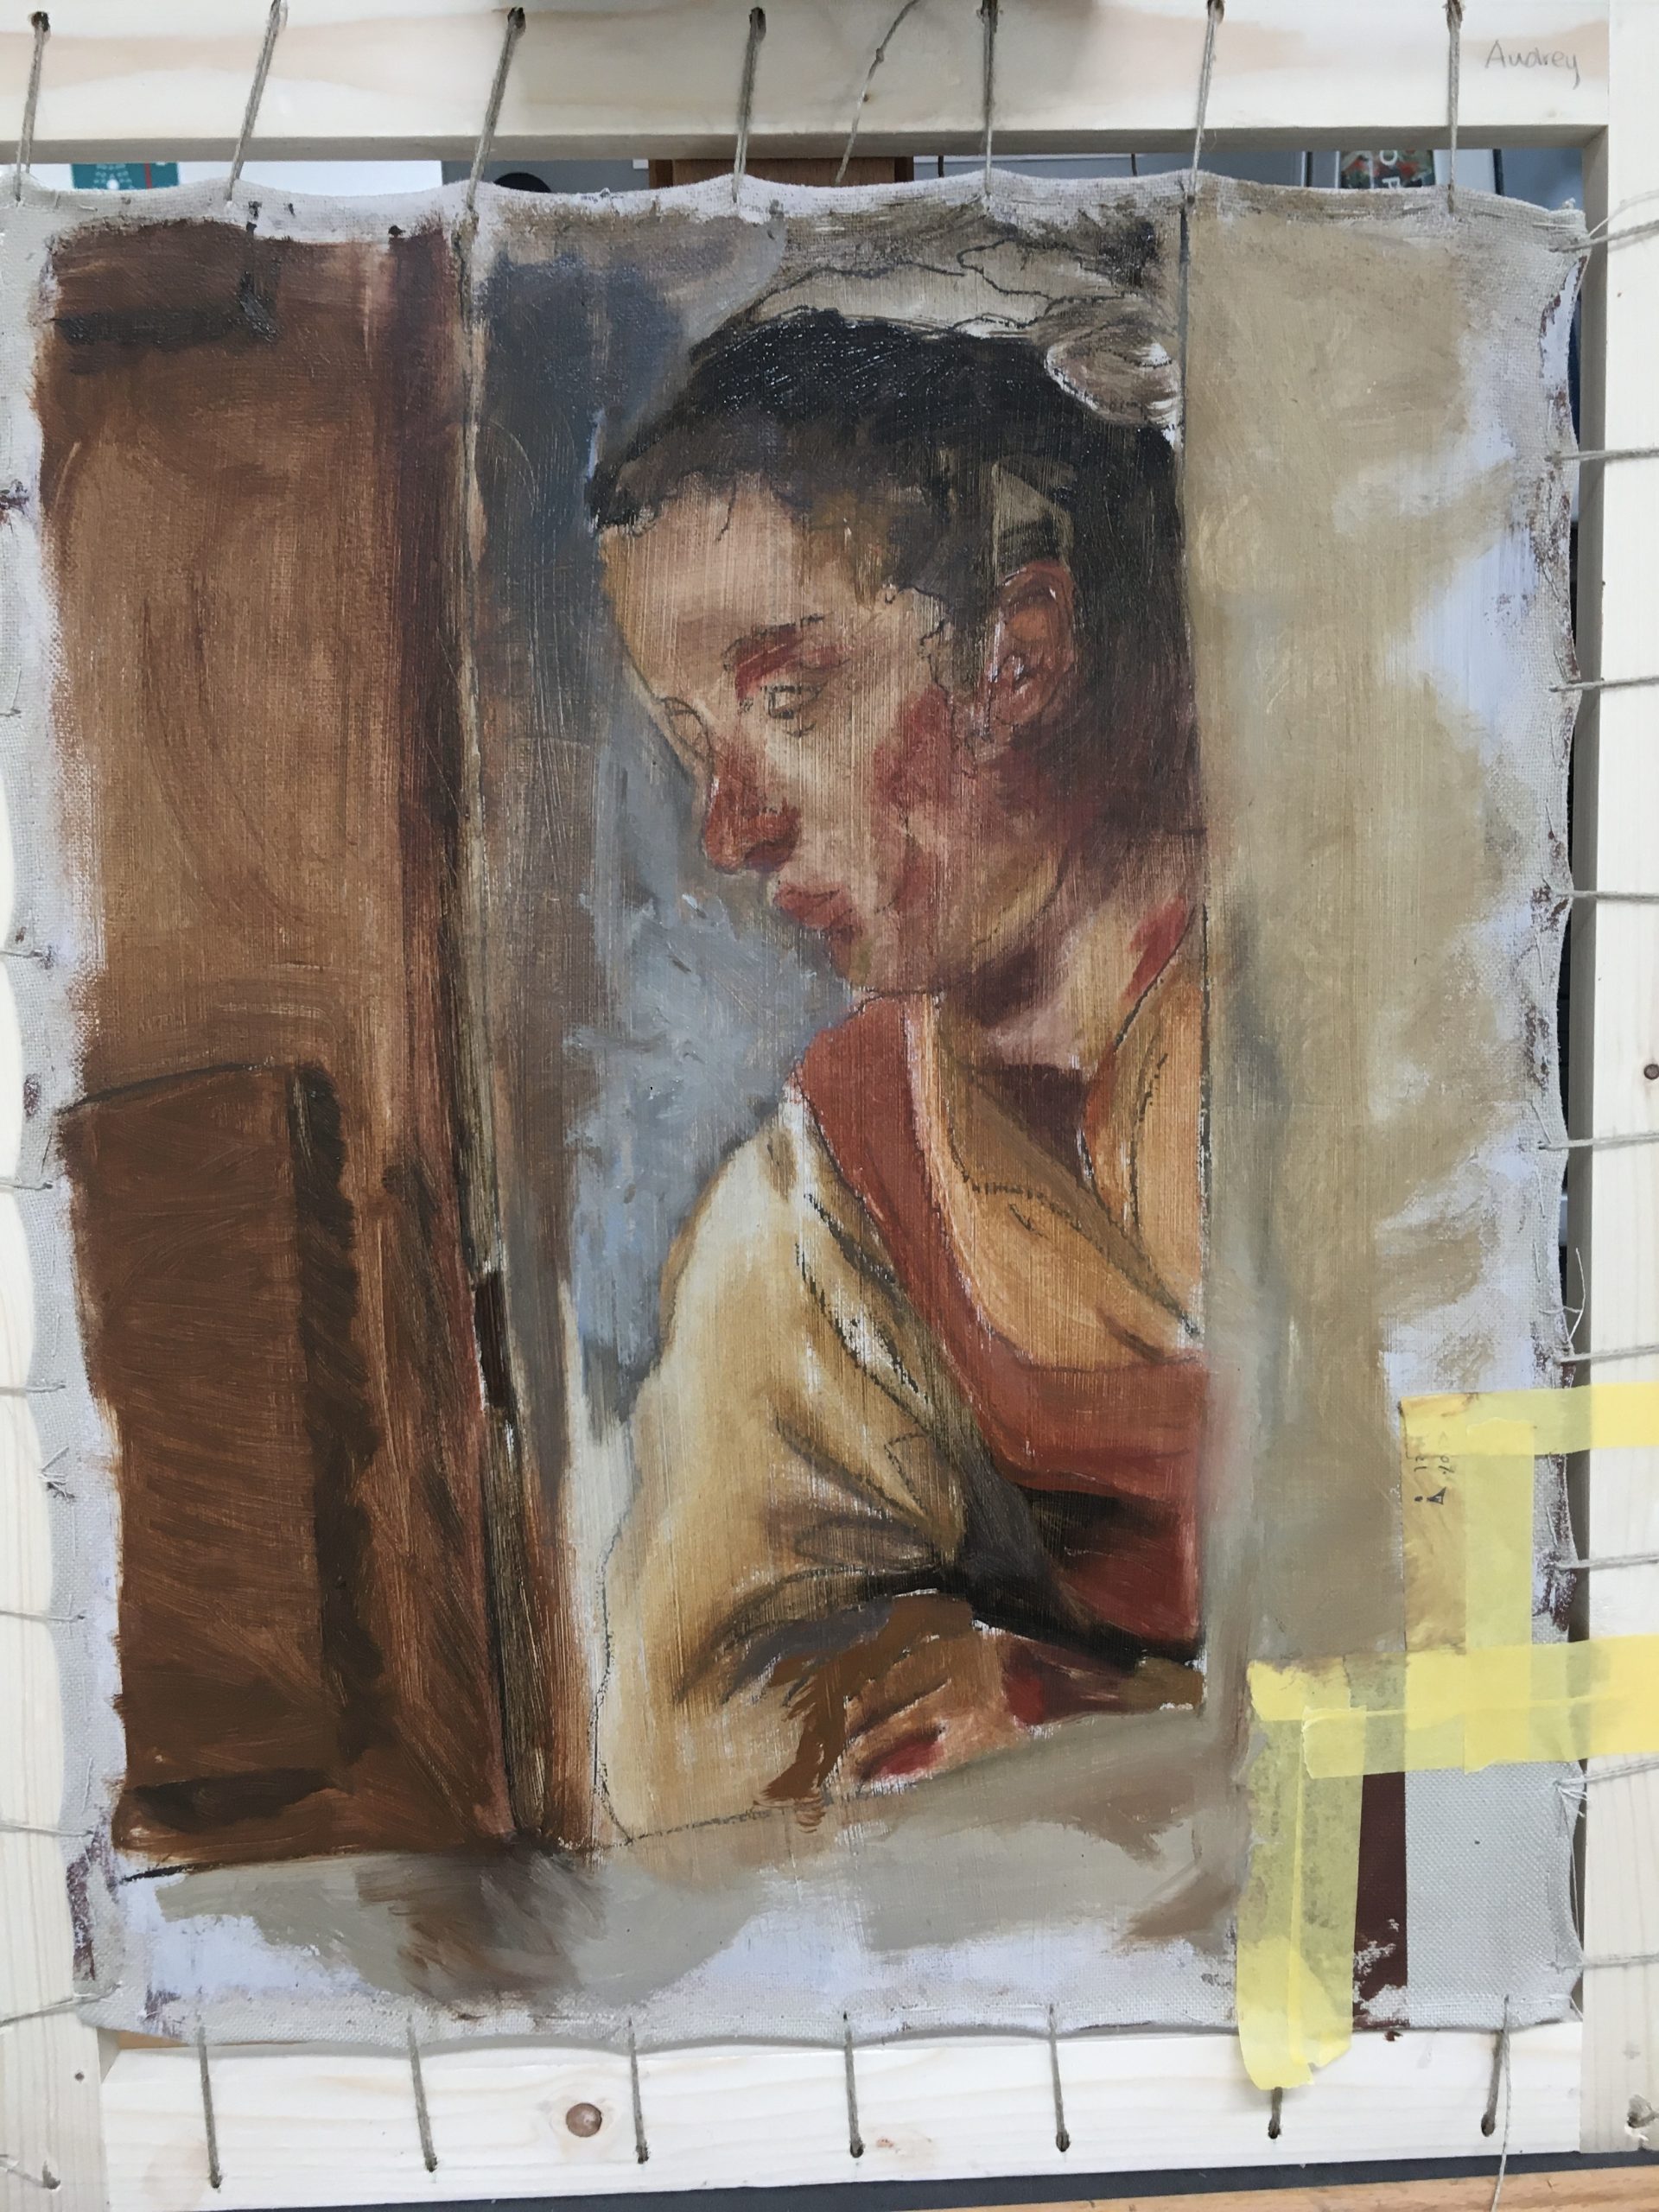
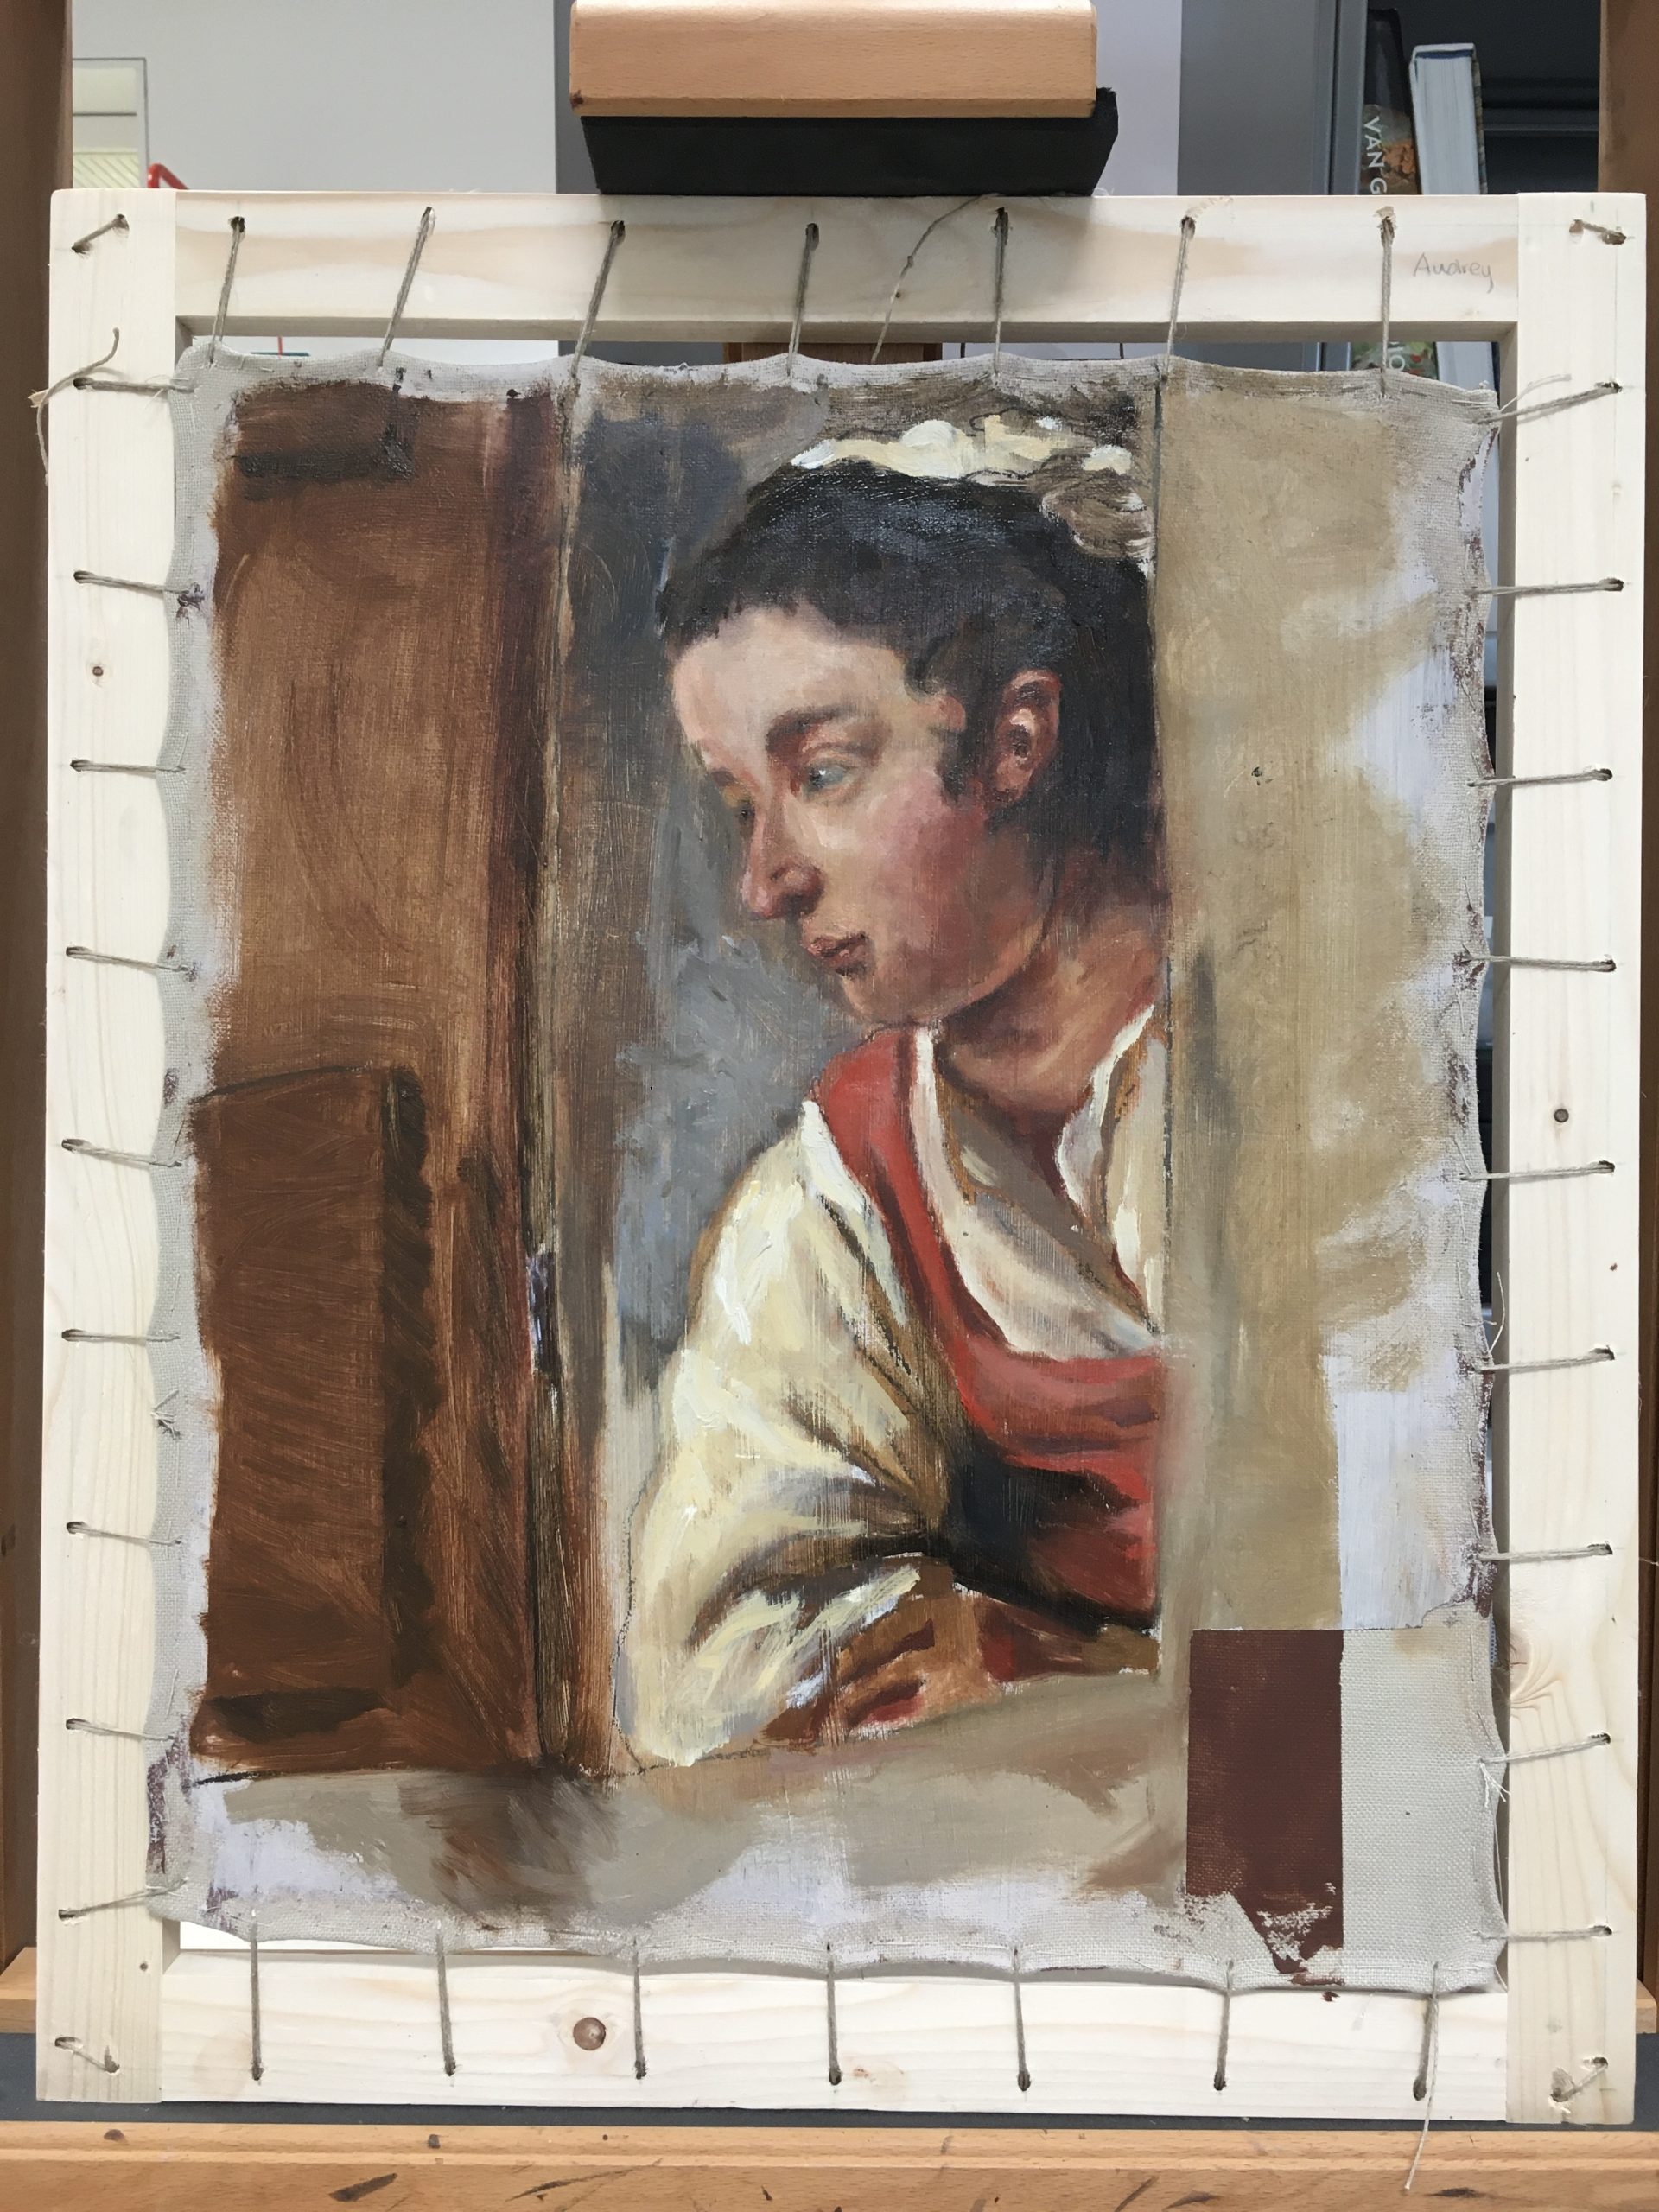
Reconstruction of Elisha refusing the gifts of Naaman, Ferdinand Bol, 1661, Oil on canvas

Currently in the collection of Amsterdam Museum
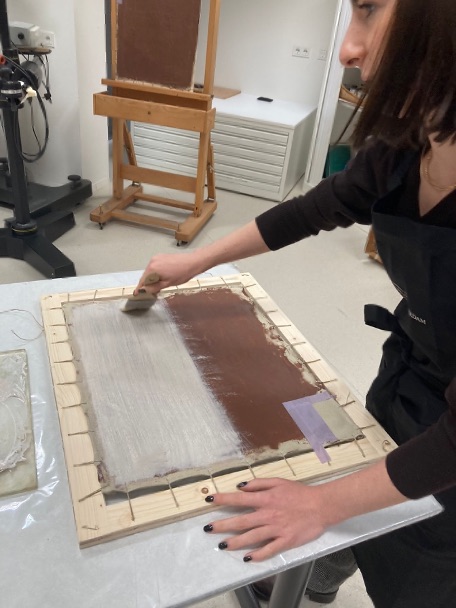
Canvas Preparation:
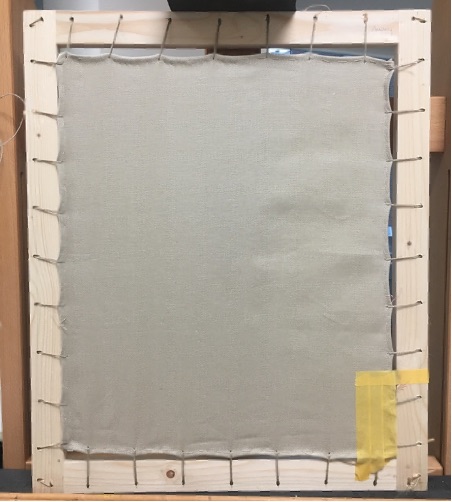
The stretching technique shown in the pictures can be found in many seventeenth-century paintings. A rope is sewn into a seam along the edges of the canvas, after which holes are made right under it to allow another rope to be threaded through the canvas and the stretcher. This second rope could then be pulled tighter to stretch the canvas.
Next, the canvas was sized with a layer of glue to seal the fabric, preventing it from absorbing too much paint.
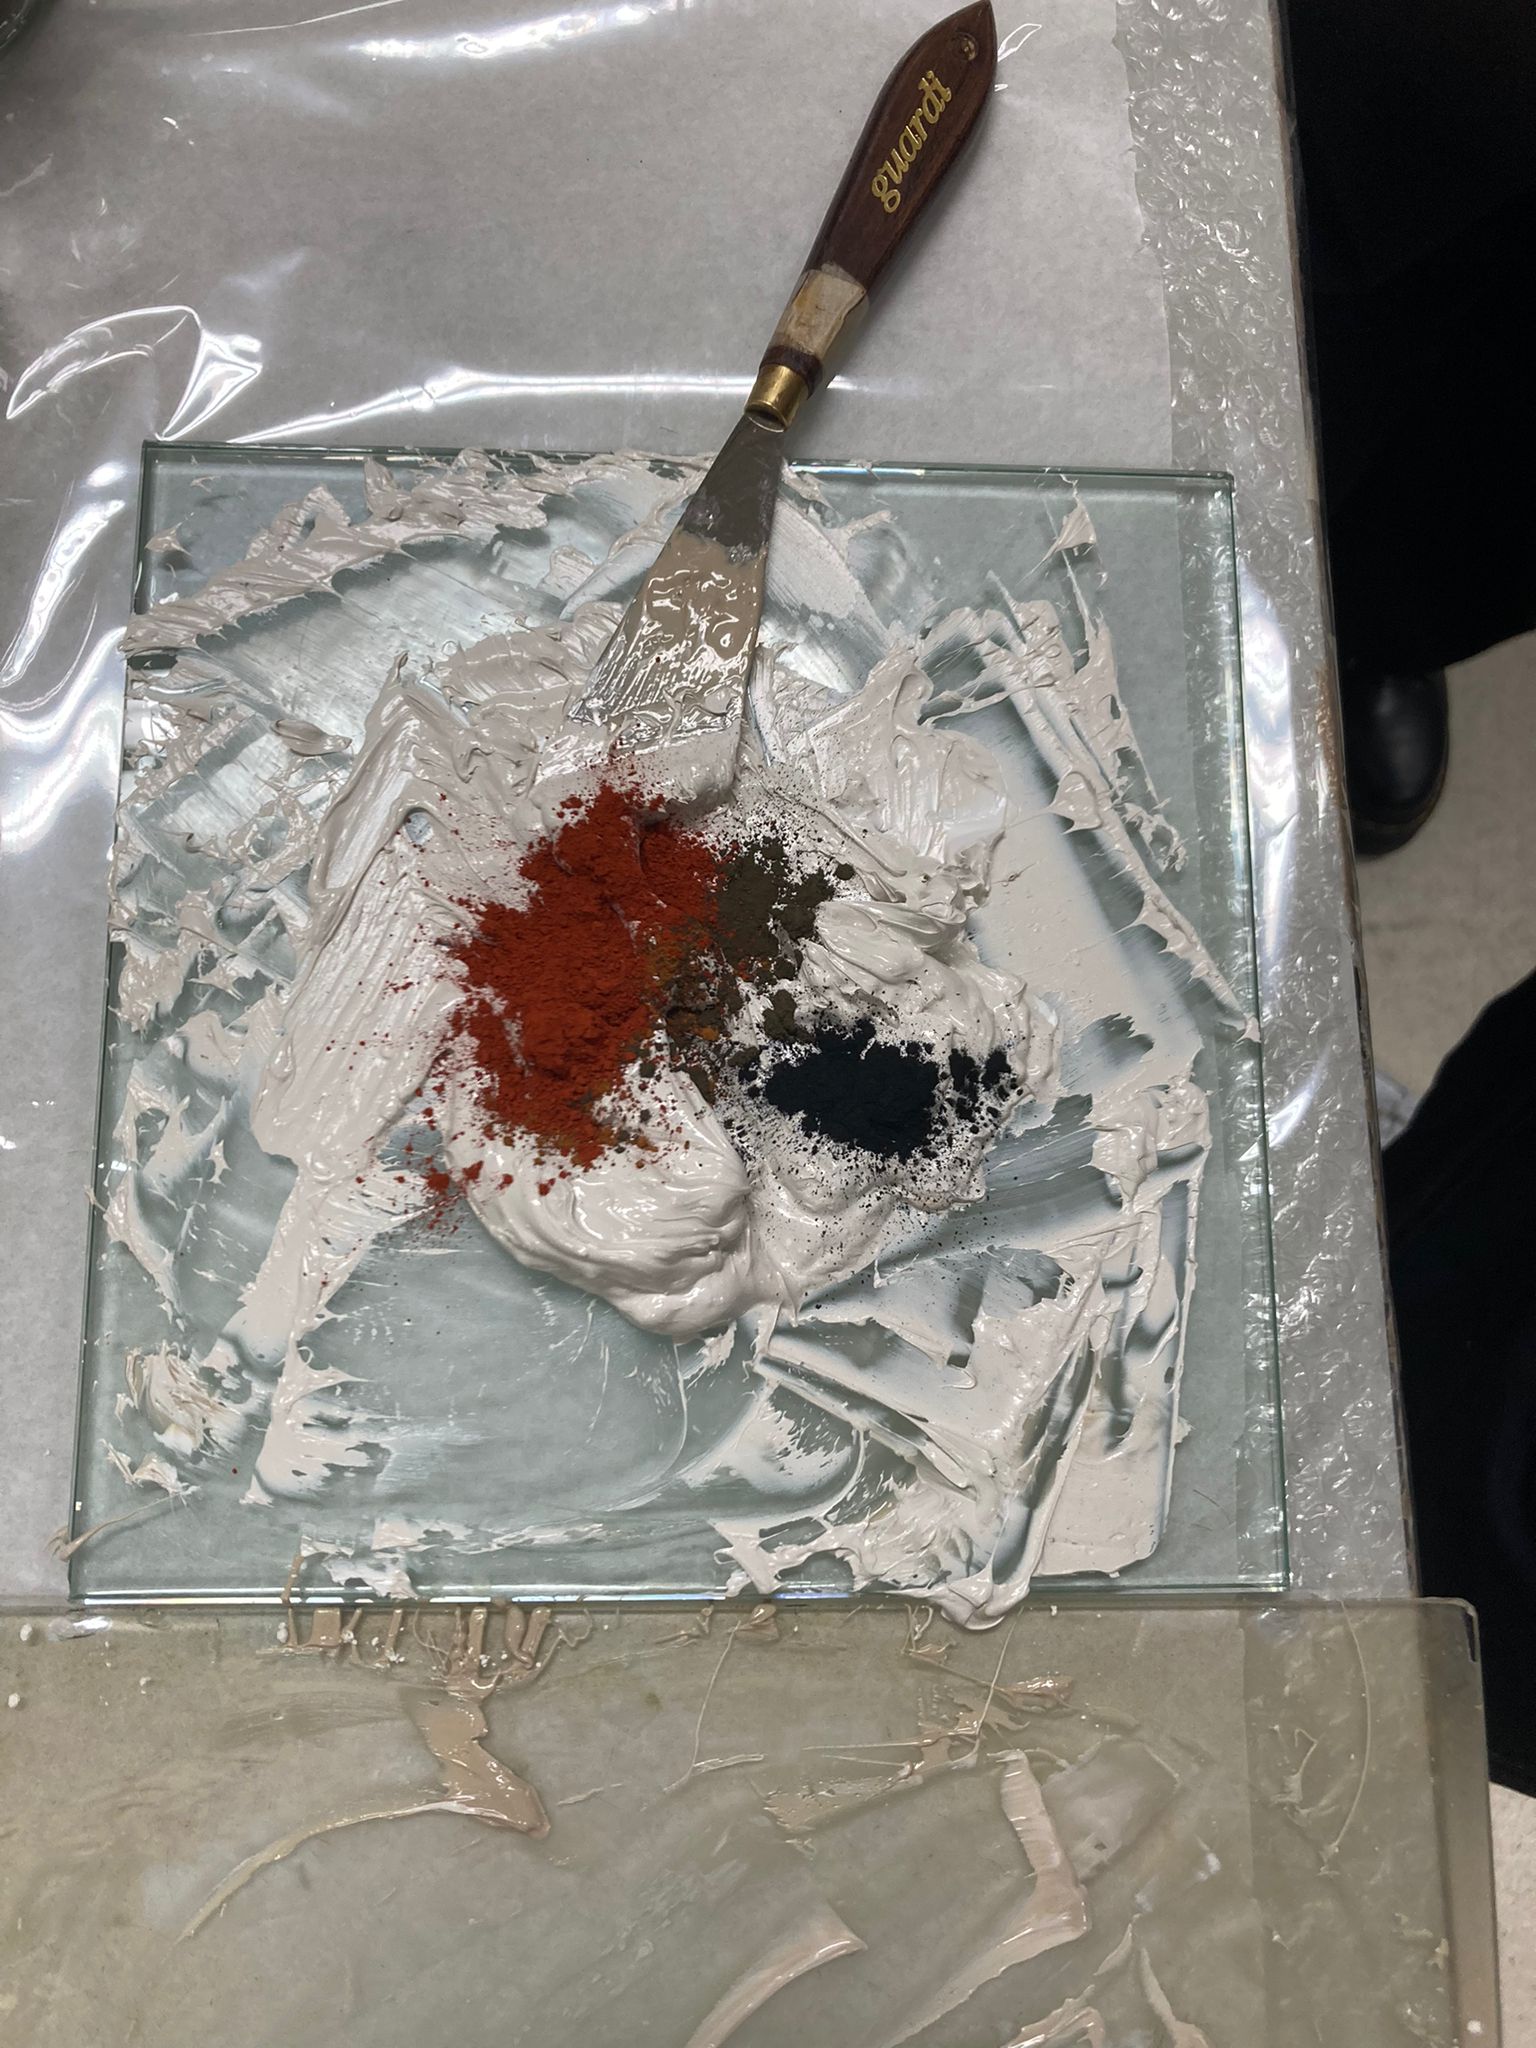
Ground Layers:
Bol applied a double ground layer to the canvas: a first red layer containing a large amount of chalk and a second pinkish-grey layer to provide the right undertone and texture for painting.
Sketching:
Bol meticulously sketched his compositions on the prepared canvas with charcoal.
Preparatory paint layers:
In the first paint layer, often referred to as the ‘underpainting,’ the rough shapes and colours were defined. In the seventeenth century, tubed paints were yet to be invented. Instead, the artists (or their assistants) manually ground each pigment into paint using mortar and oils.
Final Paint Layers:
Lastly, Bol applied the final paint layers, introducing more vibrant colours to the composition. In some cases, Bol utilized glazes—thin, transparent layers of paint—to achieve specific effects, deepen colors, or create a luminous quality. Parts of the underpainting can often still be noticed underneath in the final painting.
Golden times with Italian panel painting

Reconstruction of Saint Galganus, Giovanni di Paolo, 1447-1449, Tempera on panel
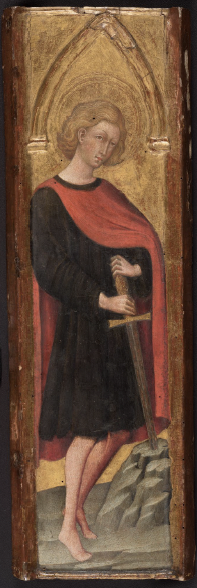
Currently in the collection of Museum Catharijne Convent
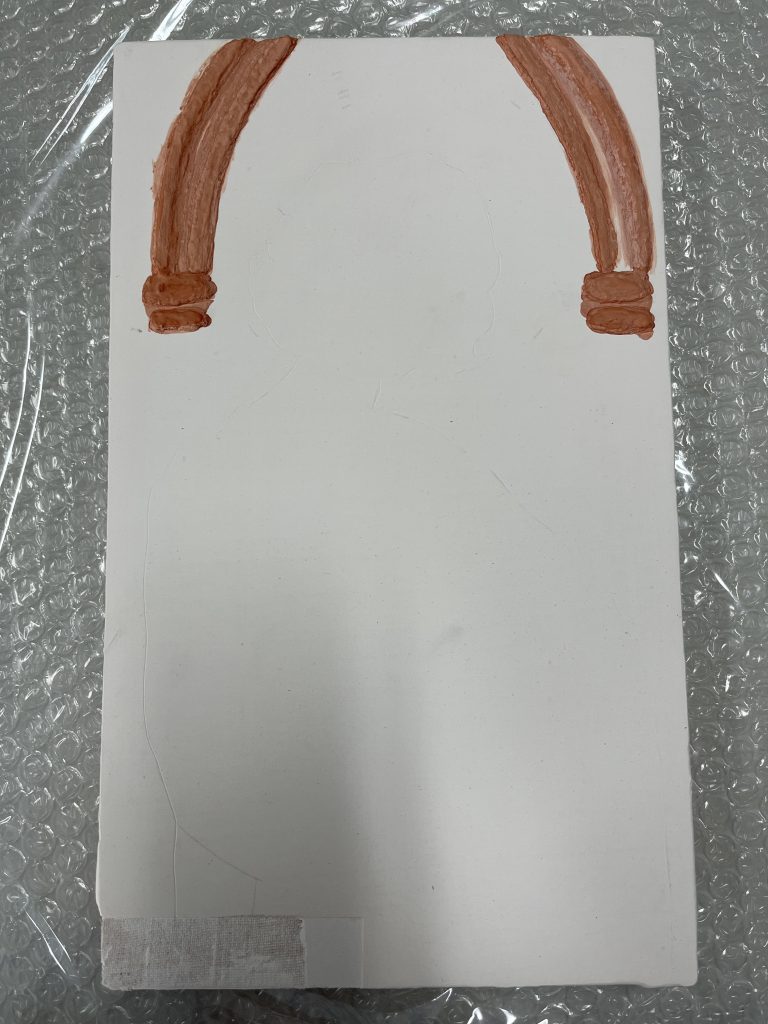
Preparing the panel:
In the Italian panel painting tradition, panels were usually sized first with animal glue. Next, a canvas would be glued either over the entire panel or over the seams and imperfections of the planks. Several layers of gesso are then applied, each sanded before applying the next. Here, eight layers were needed to get to a perfectly even and smooth surface.
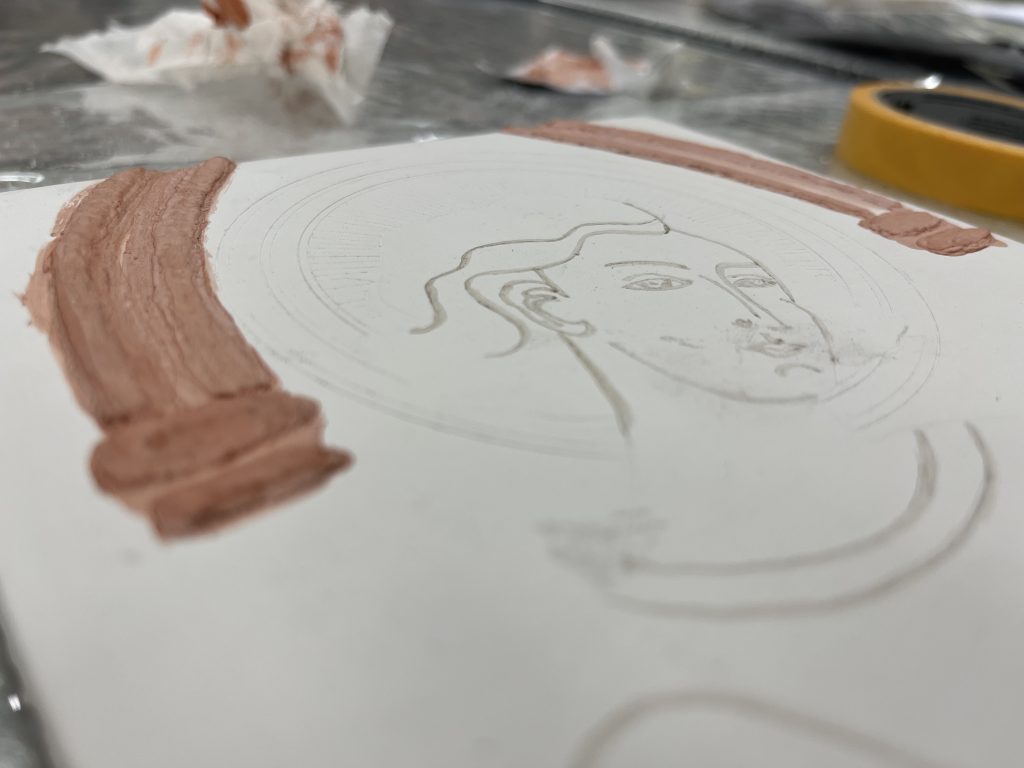
Adding relief:
More gesso was used to create a relief on the panel. This raised gesso layer is also referred to as ‘pastiglia’. Next, the drawing was scored into the gesso and traced.
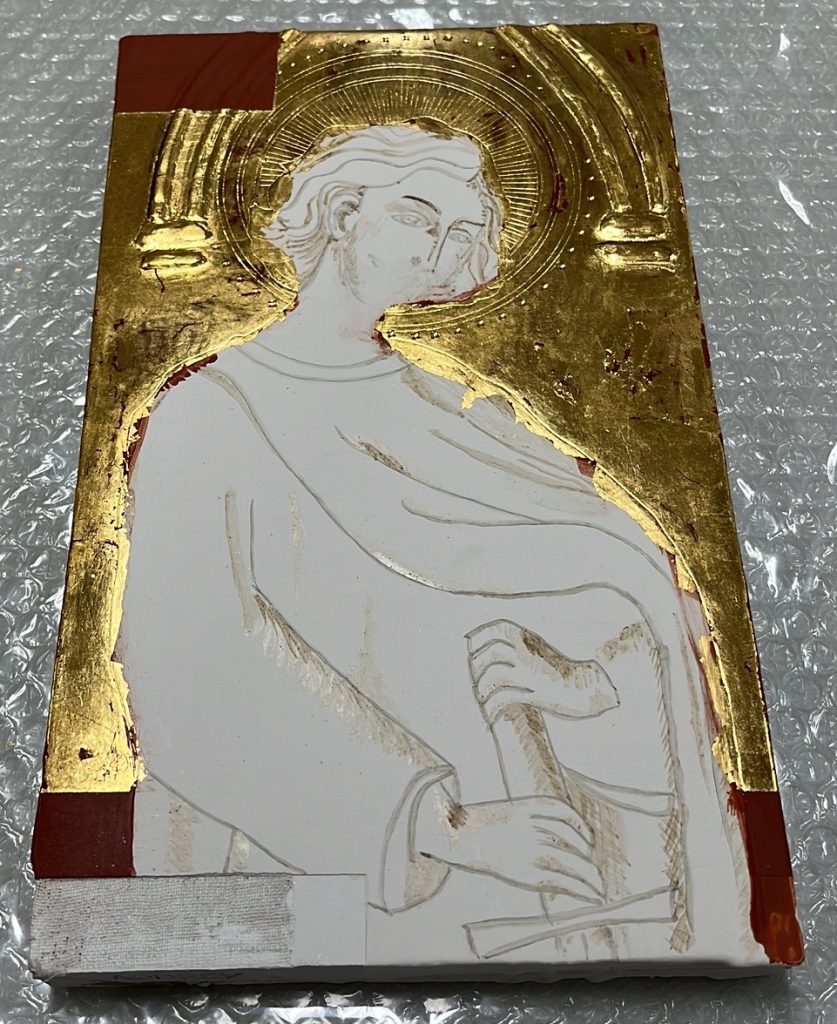
Gilding:
Before the selected areas can be gilded, a red bole is applied. This layer consists of a type of red clay mixed with water and glue, polished to create an ultra-smooth surface. Next, the surface is gilded with gold leaf and painstakingly polished to achieve its shiny look.
Dead paint:
The paint is made by grinding pigments, egg yolks, and a small amount of water together. This results in a fast-drying paint well-suited for detailed and precise work. Sometimes small amounts of vinegar were added to improve the brushability of the paint and lengthen its drying time. First, an underpainting is made, also called ‘dead paint,’ because of its lack of colour and vibrancy. Often, parts of the dead paint were left bare in shadowy parts of the painting. Interestingly, a greenish tint was often used for skin tones in this stage!
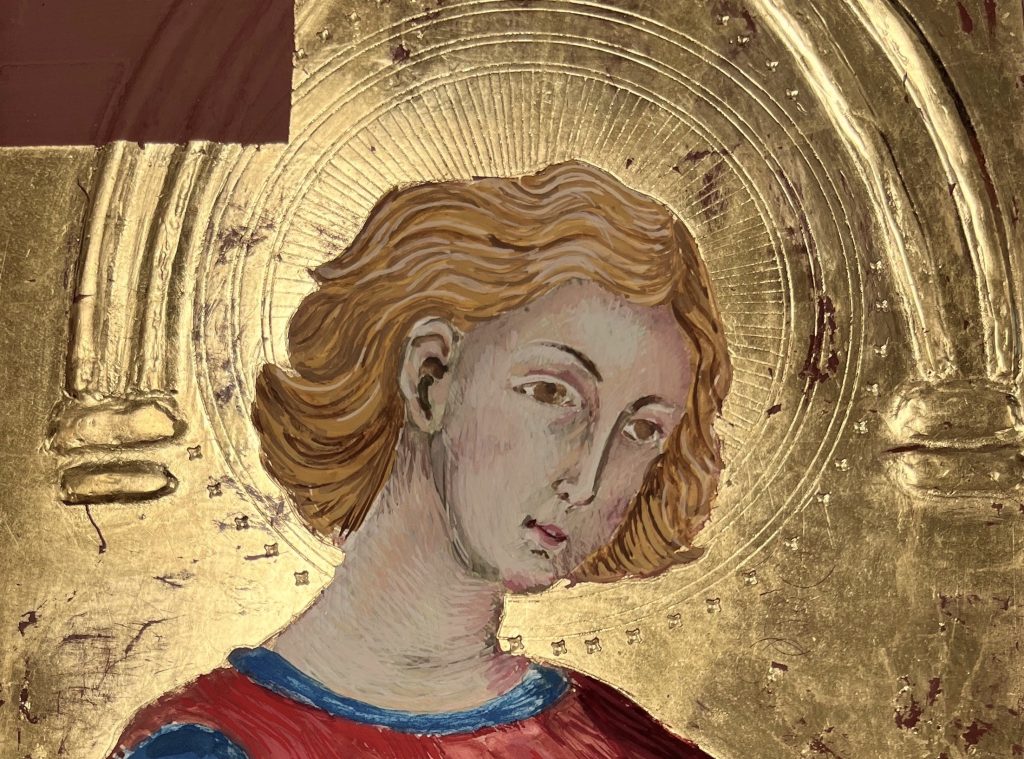
Final paint layers:
Finally, the painting is worked up using very fine strokes of paint close to each other, allowing the artist to incorporate fine details.