
Both surface dirt cleaning and varnish removal are critical not only for aesthetic reasons but also for the long-term preservation of paintings. These processes help in stabilizing the artwork, preventing further degradation. Moreover, they provide valuable insights into the artist’s original techniques and materials, enhancing our understanding and appreciation of these cultural treasures.
Surface dirt
Over time, paintings inevitably accumulate surface dirt and grime, which can significantly alter their appearance. Dust, smoke, and environmental pollutants can form a layer that discolours and obscures details. The process of surface dirt cleaning involves gently removing these deposits to reveal the true colors and textures of the painting.
Conservators use various methods for this cleaning, often starting with dry techniques like dusting with soft brushes or vacuuming with a micro-attachment to remove loose dirt. For more ingrained grime, they might use specially formulated aqueous solutions, gels, or emulsions, carefully chosen to avoid damaging the underlying paint layers. This meticulous cleaning process demands a deep understanding of the painting’s materials to ensure that the original artwork remains unharmed.
Degraded varnish
Varnish, a transparent protective coating applied to paintings, can yellow and darken over time, significantly altering the original colour palette. The removal of this aged varnish is a transformative step in conservation, bringing back the painting’s vibrancy and depth.
Conservators usually employ solvents applied in various ways, such as with a cotton swab, in the form of gels, or with the aid of tissues, to dissolve the old varnish layer without affecting the paint beneath. This process is often carried out under magnification to ensure precision and control. The choice of solvent is crucial and is based on the varnish composition and the sensitivity of the underlying paint.
Old retouching and overpaint
The identification and removal of non-original additions, such as old retouches and overpaint, is a meticulous process that requires both technical investigation and an understanding of material history. While recent retouching can often be easily identified by its characteristic fluorescence under UV radiation, older interventions or those executed with materials similar to the original are significantly harder to detect. These historical alterations are often found to be overly extensive, covering not only the losses they were meant to hide but also large areas of the original, healthy paint layer. Safely removing these layers is vital to uncovering the artist’s true hand and restoring the work’s visual integrity.
Examples from my practice
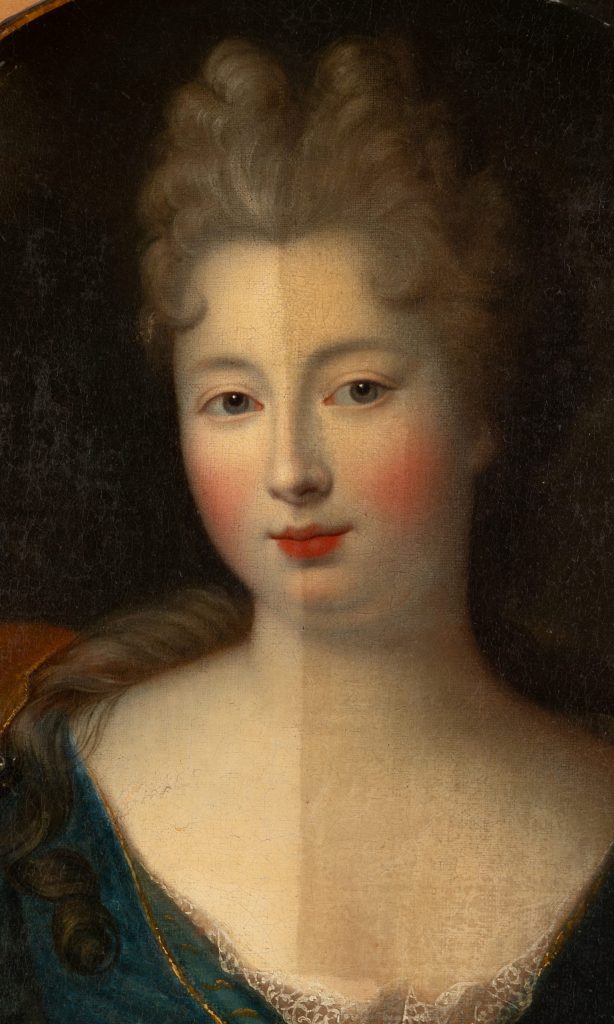
During treatment, VIS image
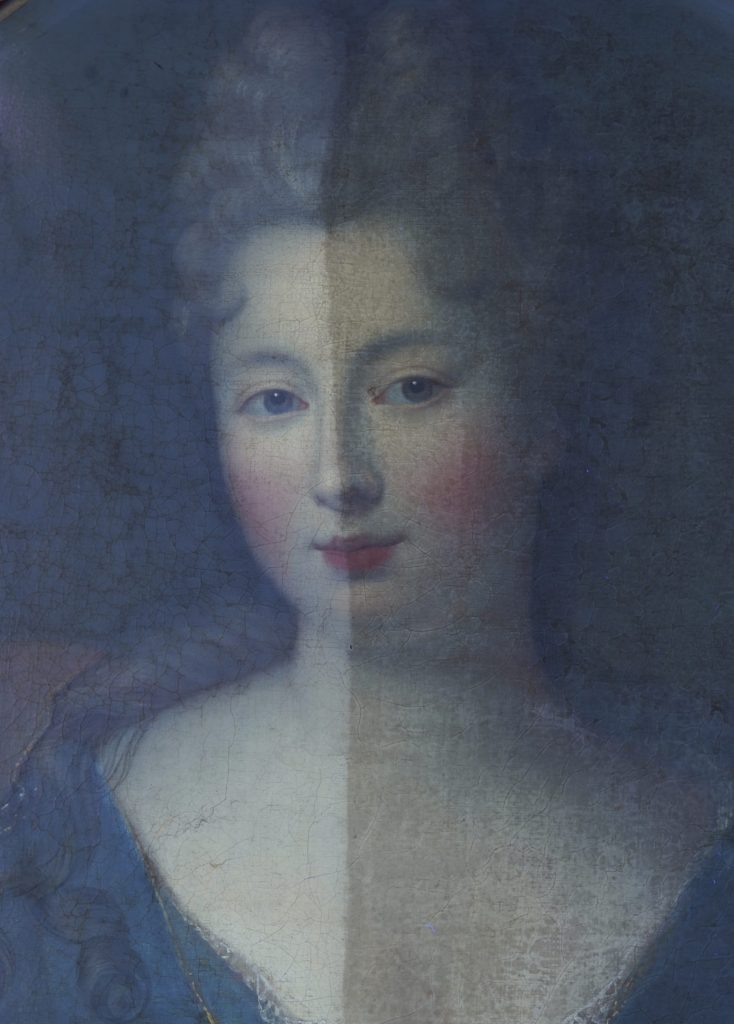
During treatment, UV image
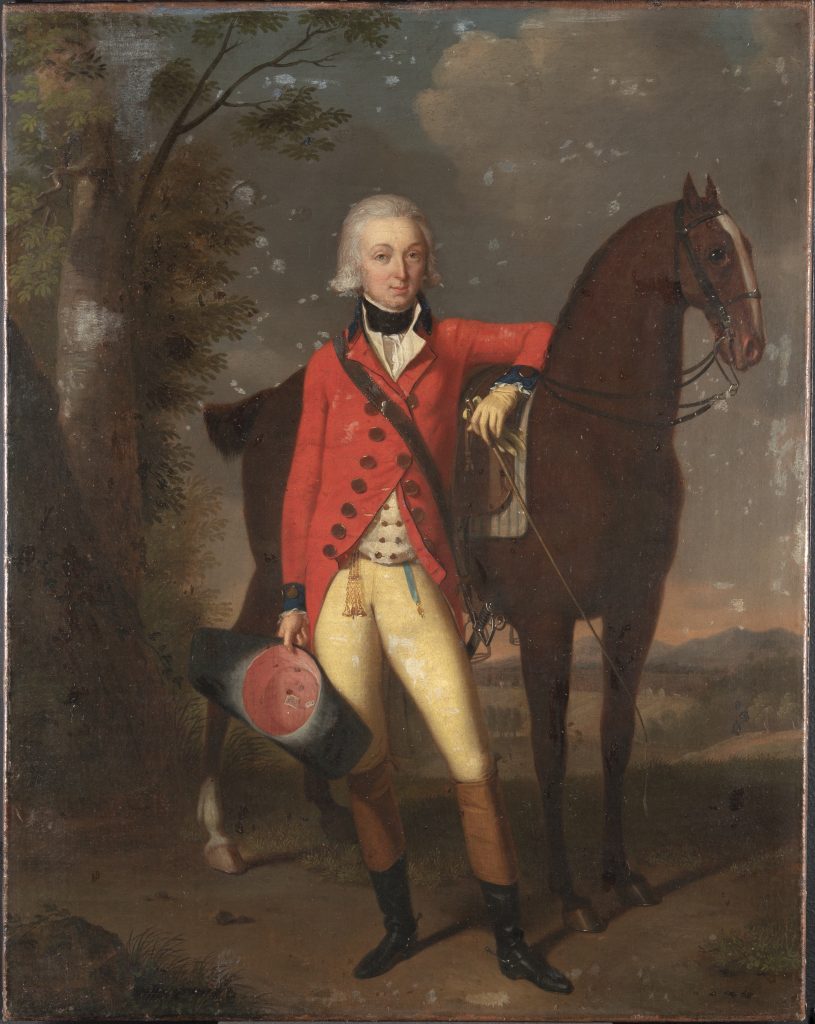
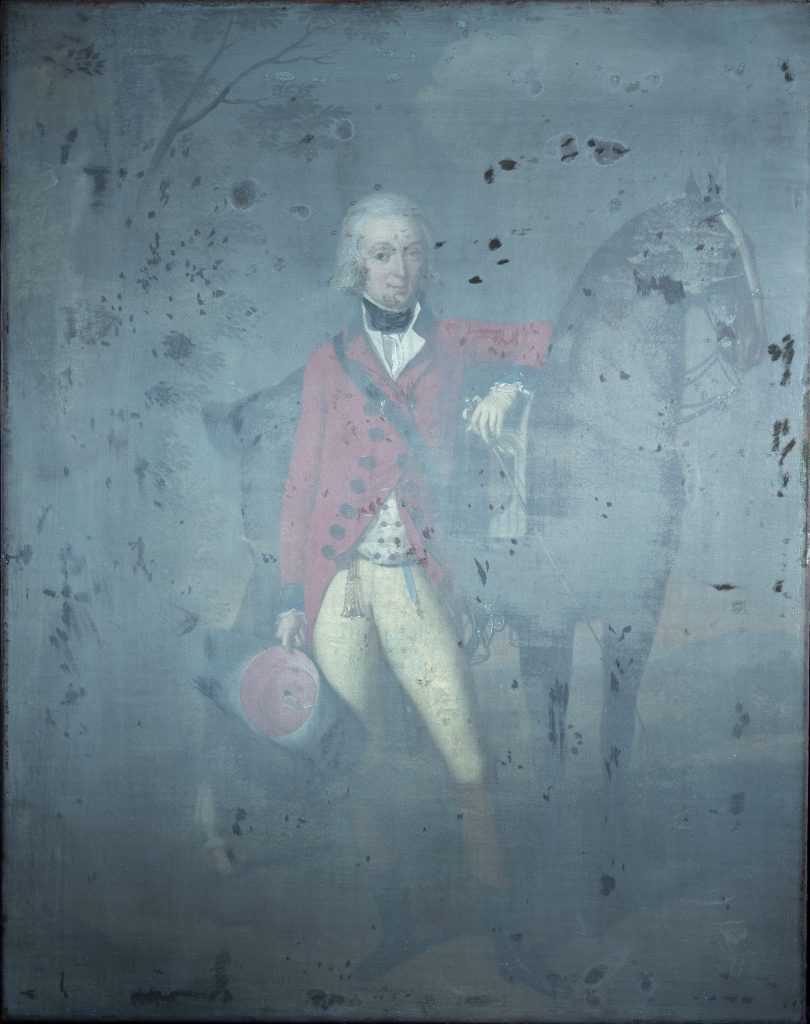
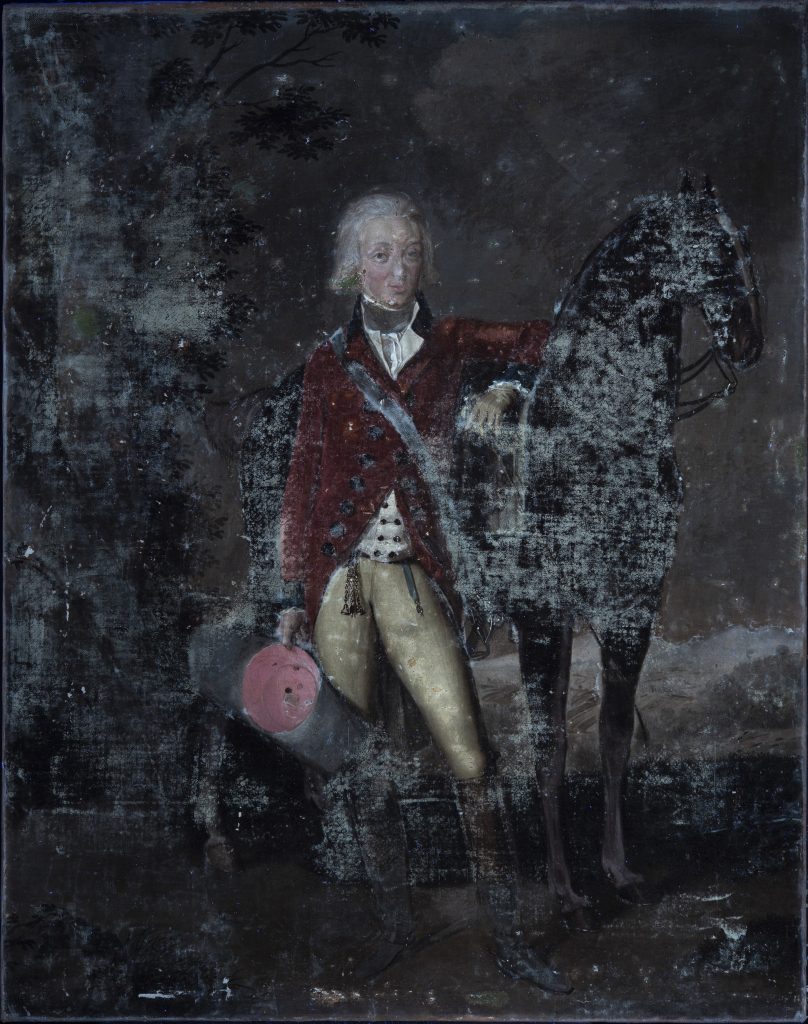
Surface dirt removal from an 18th-century portrait
This beautiful French painting hung in a private collection after being bought at auction. Over the years, it accumulated grime and dust, as is natural with all paintings.
The surface was thus cleaned using both dry- and wet-cleaning methods, carefully adapted to the texture and pH level of the painting.
After cleaning, the colours in the painting became much more vibrant. This painting illustrates that a simple treatment can yield great results.
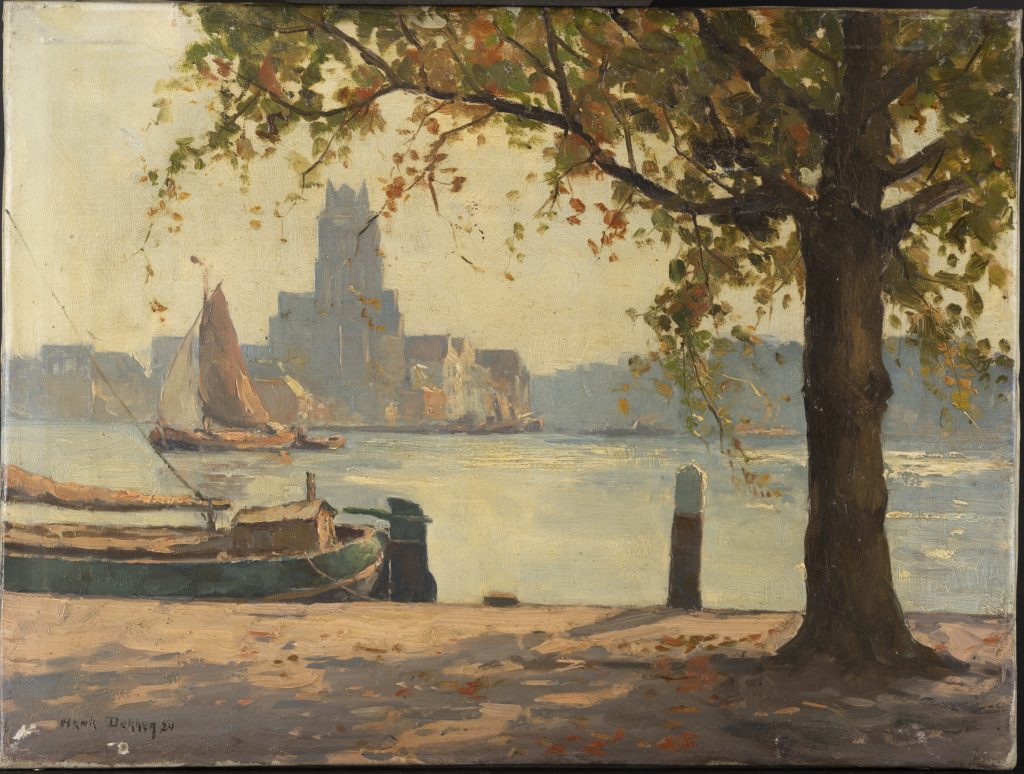
Before treatment, VIS image
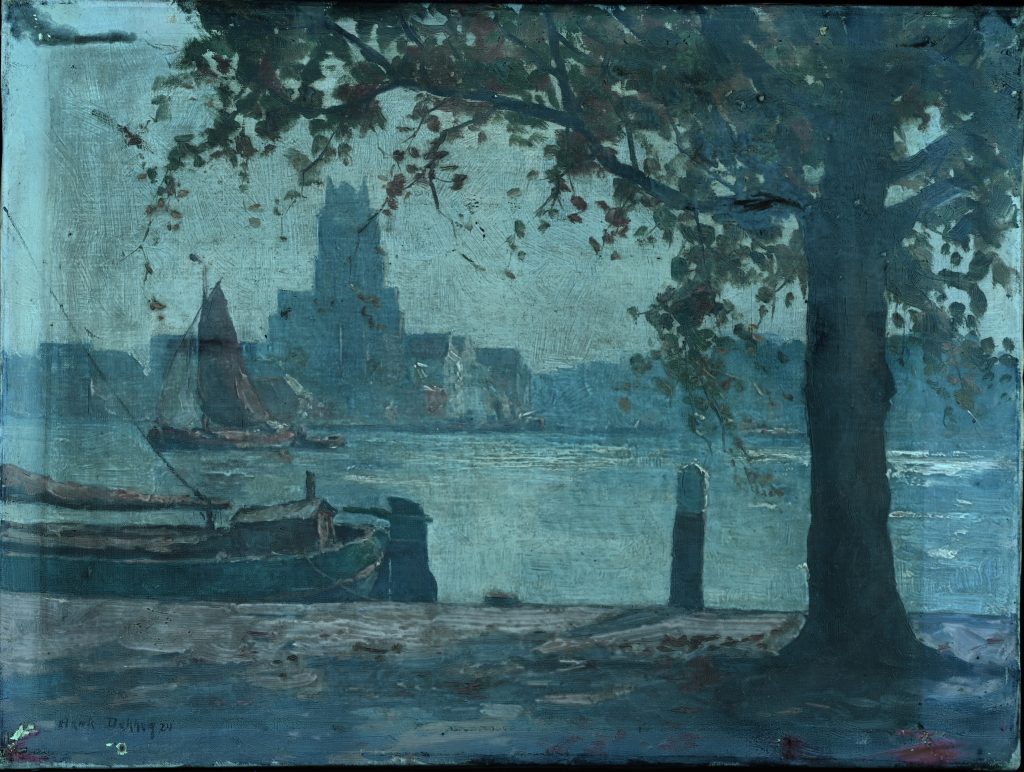
Before treatment, UV image

After varnish removal, VIS image
After varnish removal, UV image
Surface dirt and varnish removal from a well-preserved 1920s impressionistic painting
Before treatment, this painting had accumulated a significant layer of surface dirt on top of its significantly yellowed, unoriginal varnish. Because of this, the shape of the frame could be clearly traced along the edges of the painting, especially when observing the painting using ultraviolet fluorescence.
The surface was thus first cleaned of surface dirt using dry- and wet-cleaning methods carefully adapted to the texture and pH level of the painting.
Subsequently, the varnish layer was removed using a combination of free solvents, gels, and tissues.
After cleaning, the paint layer proved to be in excellent condition. The vibrancy and depth of the artwork could once more be appreciated.
Before treatment, VIS image
Before treatment, UV image

After varnish removal, VIS image
After varnish removal, UV image
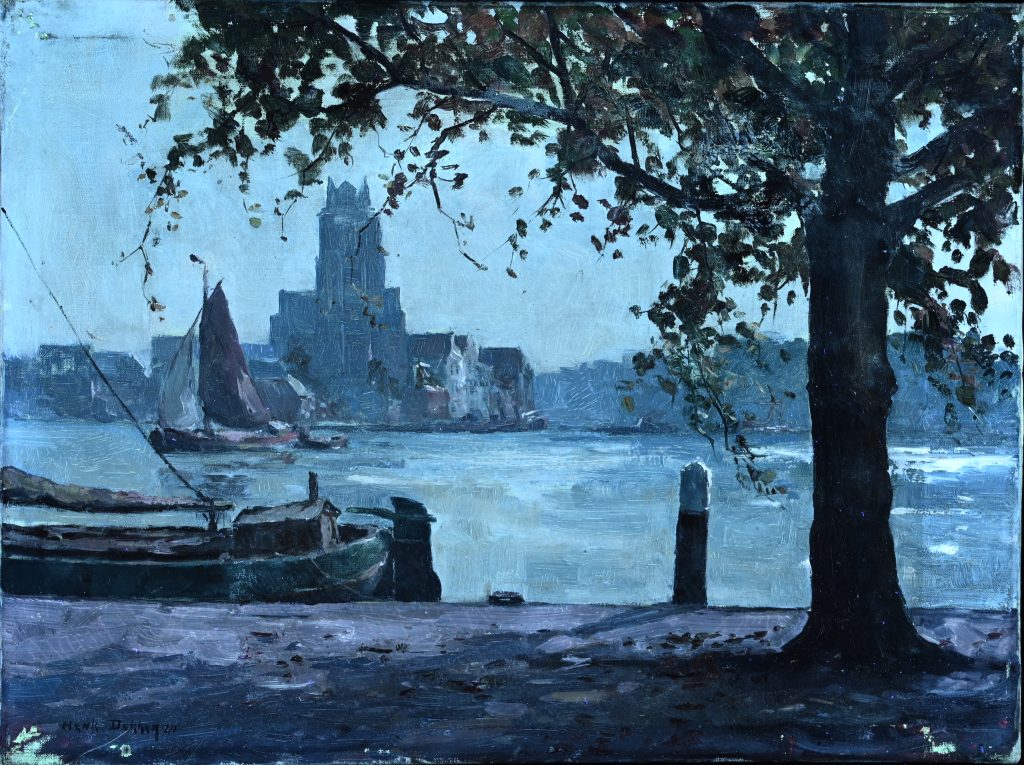
Varnish- and retouching removal from a damaged and wax-resin lined 19th-century painting
This painting underwent a rather drastic conservation intervention in the last century: it was wax-resin lined. This means that a secondary canvas was adhered to the backside of the original canvas using a wax-resin mixture for adhesive. During this conservation treatment, the painting was also retouched and re-varnished. The old retouching is now clearly visible, as it has aged differently from the rest of the painting (see, for example, the lighter spots in the sky in the top left image). In addition, the aged varnish gives the painting a yellow glow and diminishes the colour contrasts present in the artwork.
Since no surface dirt was present on this painting upon arrival in the studio, varnish removal could commence immediately. However, since the paint layer was badly damaged, this was no easy task. Along with many small paint losses, the paint layer was also underbound in multiple areas of the painting. This meant that the varnish layer now also partially acted as a binding medium, keeping the pigments off the paint together. A full varnish removal would thus cause paint loss, and this had to be avoided at all costs. In addition, residues of an older varnish were discovered under the think varnish layer applied during the previous conservation treatment. These patchy areas of varnish were most likely left by the previous conservator for the same reason as they are left now: to protect the underbound paint layer.
These problems necessitated a flexible cleaning protocol. Continuous adaptation of the cleaning solvents and application method combined with the use of gels and tissues to minimize solvent penetration eventually resulted in the ‘bare’ state from which further treatment became possible. The areas that were most underbound and on which thus more varnish was left can be clearly made out in the UV image taken after varnish removal.
Before treatment
After scuff removal
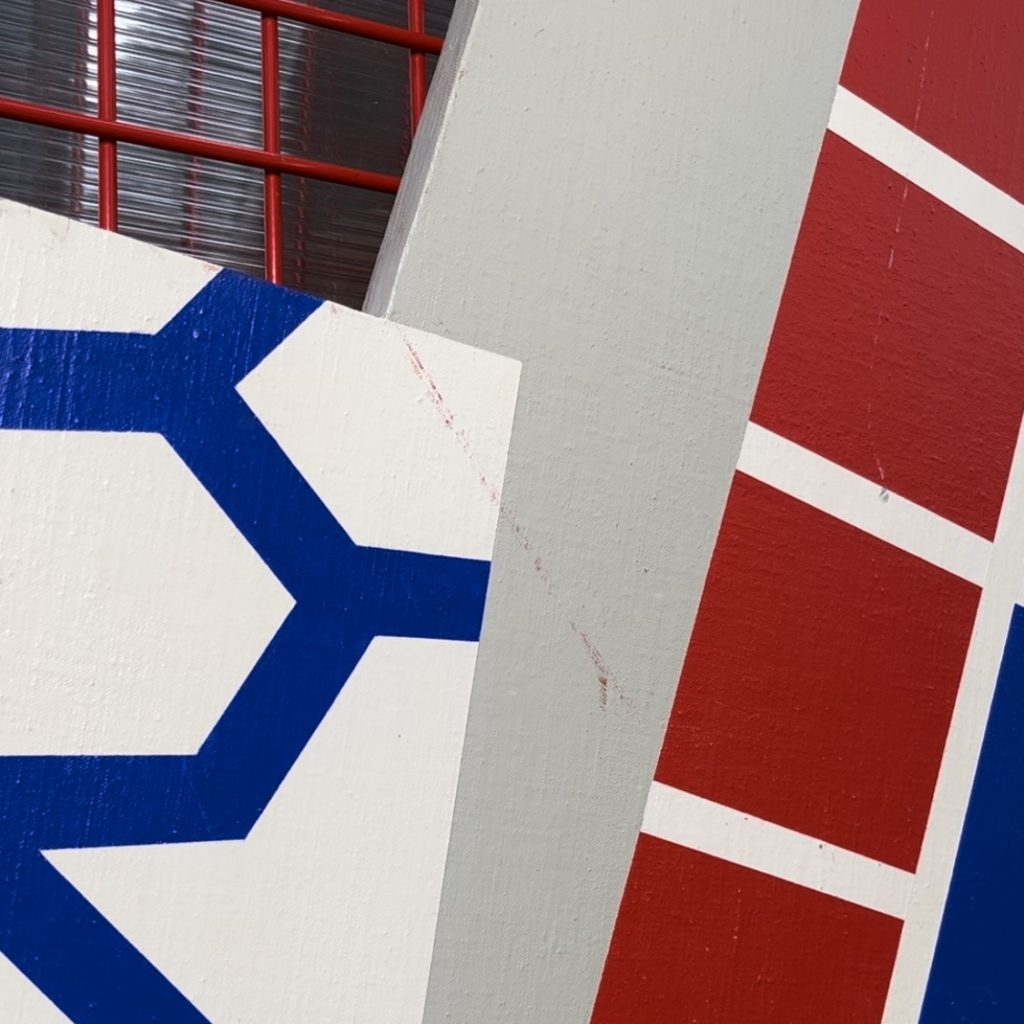
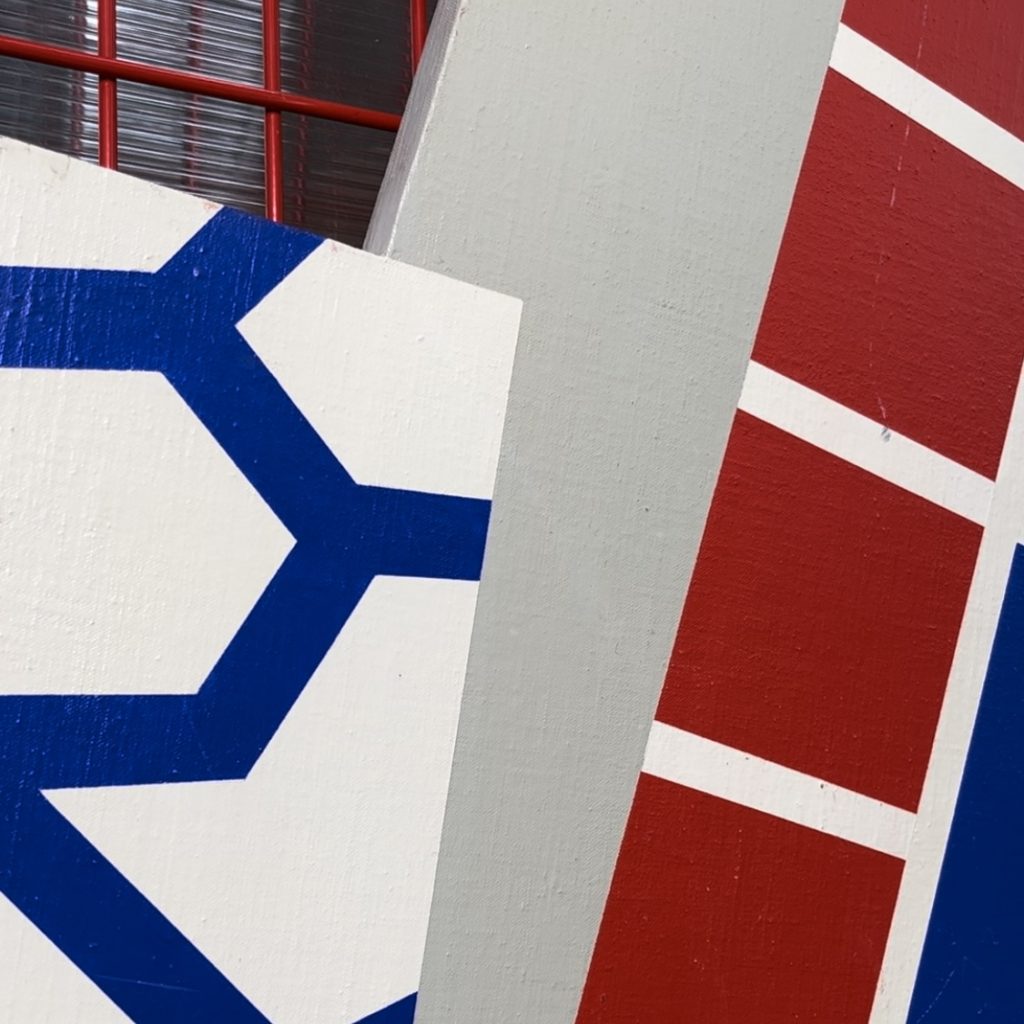
Scuff removal from a 20th-century ensemble painting
The detail pictures on the left belong to an ensemble of 12 paintings that once hung in a conference room of a governmental organization. Here, it acquired some damage that can be expected from such a setting: coffee stains, ballpoint marks, and even a footprint could be found scattered across its surface. However, the most disturbing damage likely occurred during its transfer to a new location: various scuff marks can be seen across all paintings, the colour of which corresponds to the colours used in the paintings. Likely, they were stacked against each other, causing them to transfer paint onto each other.
These scuff marks varied in length between a couple of centimeters to almost a meter long. Nearly every painting exhibited this problem. Given the size of the artwork, about 2,70 meters by 7,20 meters when installed, the treatment of this work was a collaborative effort with my fellow students at the University of Amsterdam. The painting still has its original varnish, which luckily provided a barrier between the original paint and the scuff marks of the same material on top. However, we only wished to remove the scuff marks and not the original varnish, which limited our possible cleaning strategies. After much testing, discussion, and research, we found a solution and succeeded in safely removing these disturbing marks.
Workshops
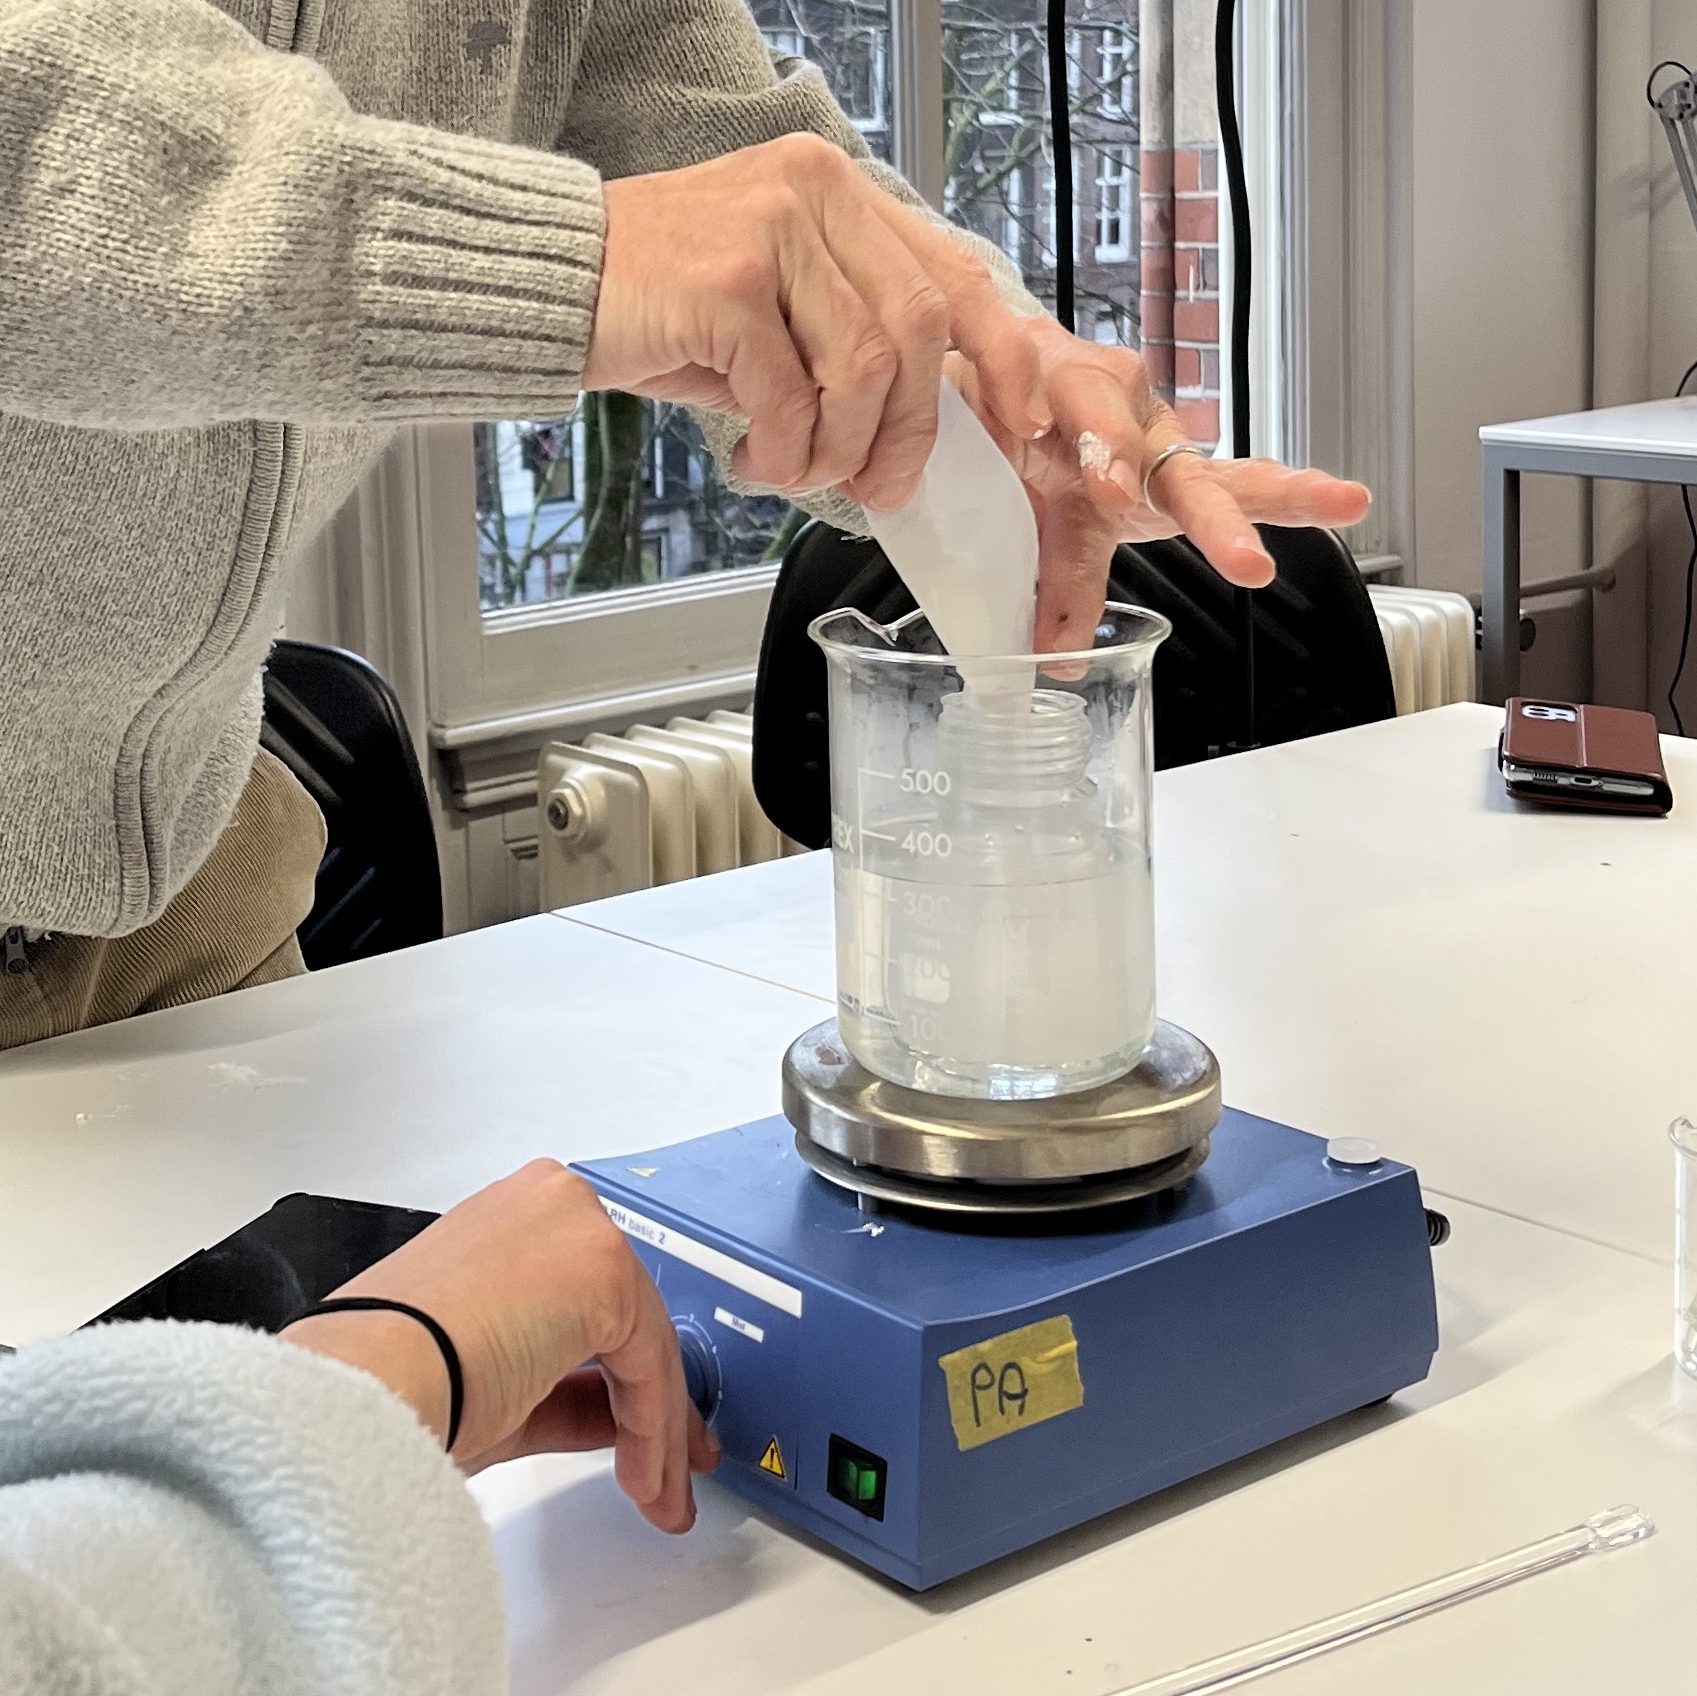
Gel formulation using a heated magnetic stirrer.
Workshop on the cleaning of fine art surfaces by Paolo Cremonesi
University of Amsterdam, December 2023
This week-long workshop offered a comprehensive exploration of advanced cleaning methods for fine art surfaces, meticulously designed to acquaint participants with the formulation of cleaning solutions and gels for surface cleaning and the nuanced removal of film-forming materials.
Renowned cultural heritage chemist Paolo Cremonesi brought a distinguished academic background to this workshop. Holding a Ph.D. in Chemistry from the University of Milan, a Ph.D. in Bio Medicinal Chemistry from the University of Nebraska Medical Center, and a Master’s degree in Restoration of Paintings on canvas and panel from the Instituto per l’arte e il restauro in Florence, Paolo is a seasoned professional with over two decades of expertise.
>> Next: Reintegration